
How I Organized Under Sink Using Simple, Affordable Solutions You’ll Actually Keep

Confession: my under-sink cabinet used to be a black hole where sponges went to retire. It smelled like damp chaos and looked worse. Then I gave it a weekend makeover using **simple, affordable solutions**—no custom carpentry, no fancy gadgets—and now it works like a tiny, efficient utility room. Want the play-by-play? Let’s open those doors and get real.
1. Audit The Chaos, Then Set Ground Rules
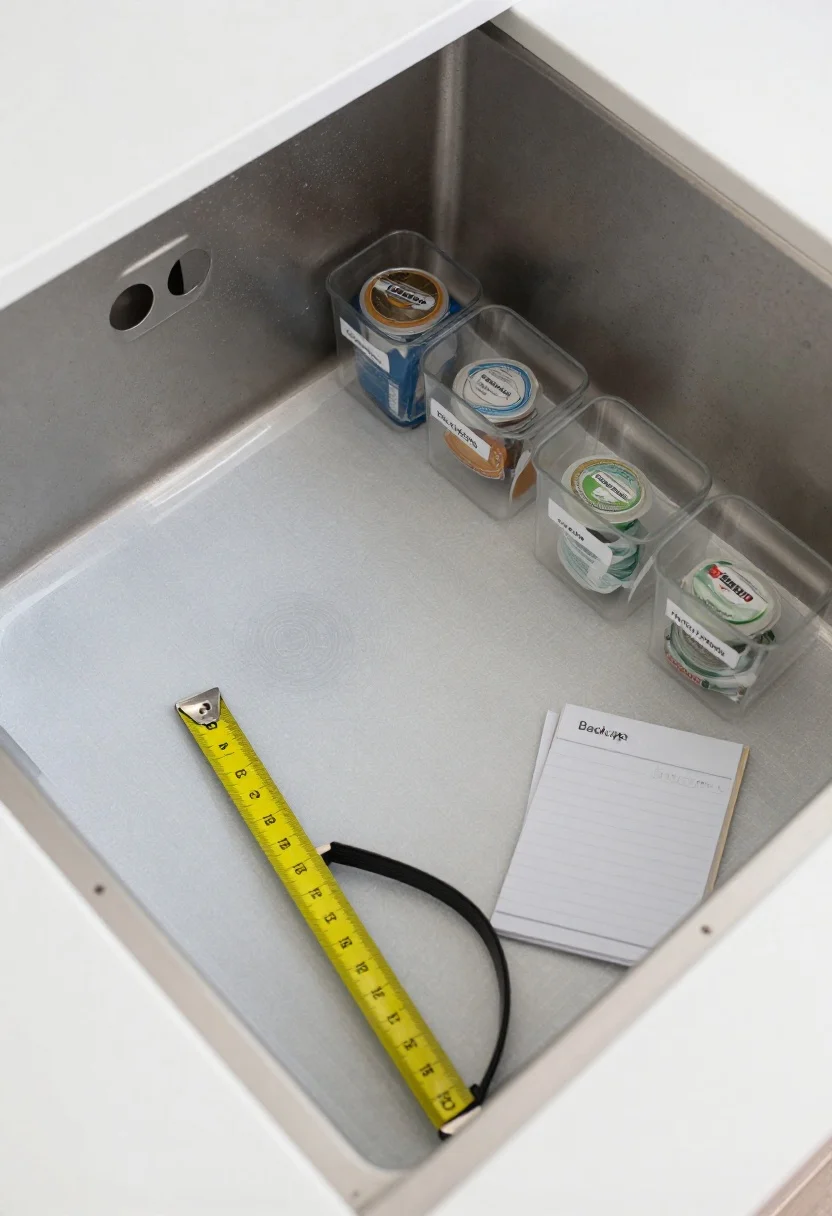
This image is by AI for inspiration only.
I started by pulling everything out—yes, everything—and doing a ruthless sort. If it was expired, leaking, or mysteriously sticky, it left the building. Then I made **category rules**: cleaning sprays, dish supplies, trash bags, backups, and tools. That’s it. If it didn’t fit a category, it found another home.
Quick Wins
- Measure first: Height, depth, and the wonky space around pipes and the garbage disposal.
- Contain leaks: Line the base with a waterproof mat or peel-and-stick vinyl to protect the cabinet.
- Decant smart: Group small sachets and pods into clear containers so you can actually see what you own.
What to shop for: Drawer liners or waterproof cabinet mats, small clear bins, basic labels.
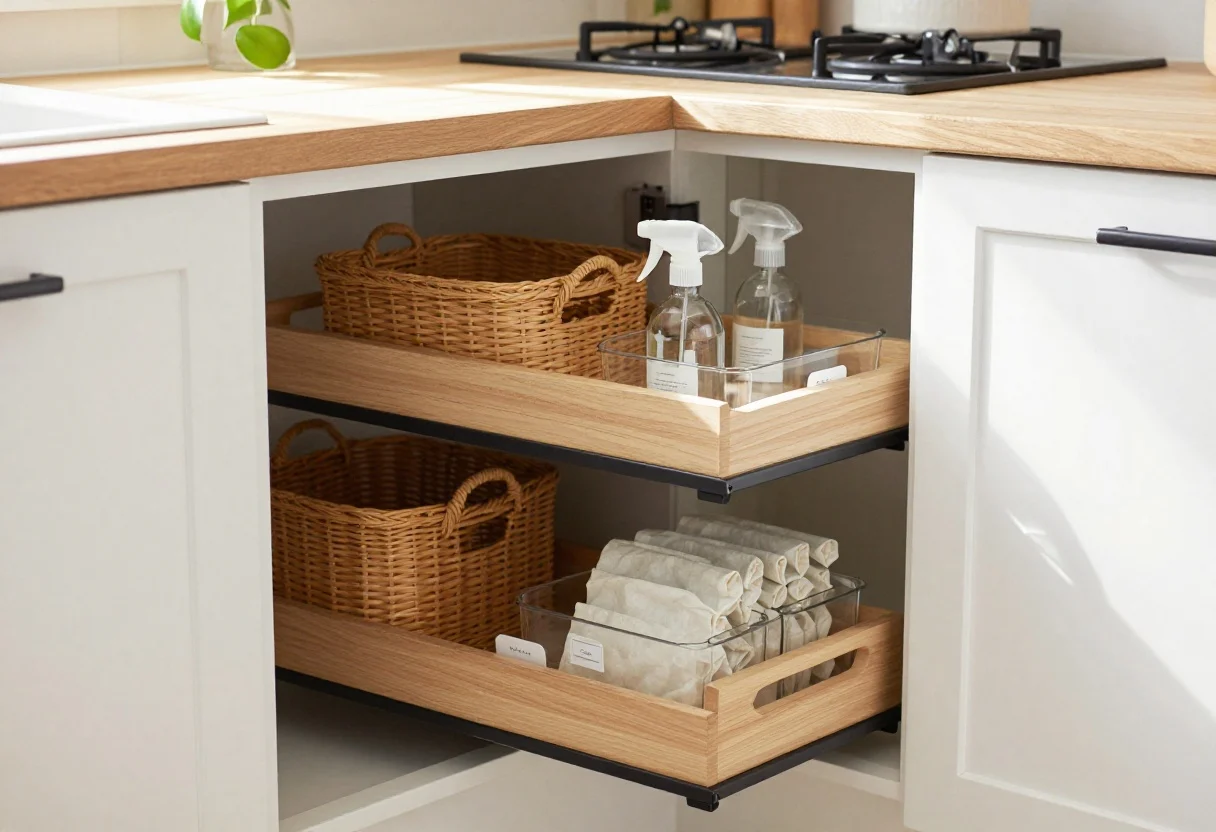
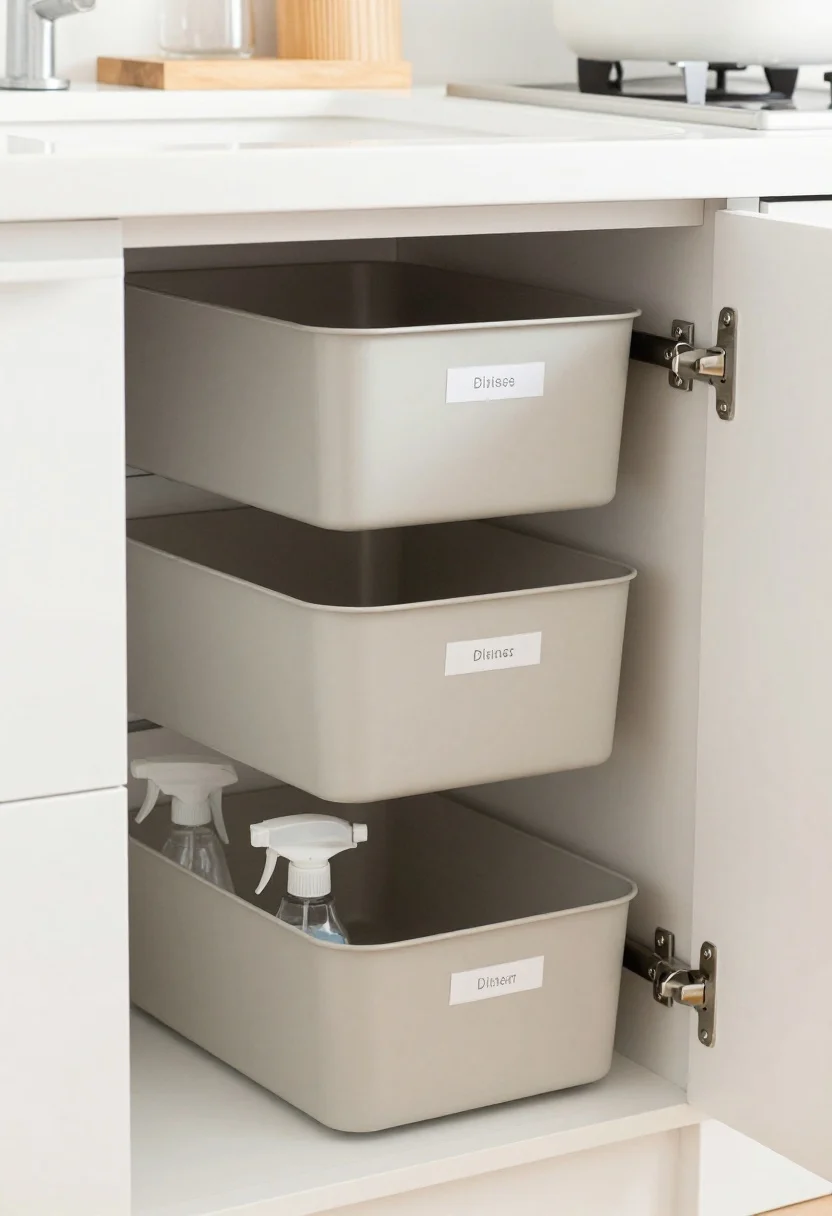
2. Work Around Pipes Like A Space Ninja
This image is by AI for inspiration only.
That maze of pipes? It’s not your enemy, it’s your blueprint. I treated the under-sink like a puzzle, tucking slim bins along the sides and reserving the center “pipe zone” for shorter items that won’t get crushed.
Structure That Fits
- Modular bins: Mix heights—short for sprays laid on their sides (no leaks, please), tall for paper towels and extra sponges.
- Stack thoughtfully: Use stackable drawers on one side and leave open space on the other for bulky items.
- Label the fronts: “Dish,” “Cleaners,” “Trash Bags” so everyone puts things back correctly. Wild concept, I know.
What to shop for: Stackable drawers, narrow bins, adhesive labels or a label maker.
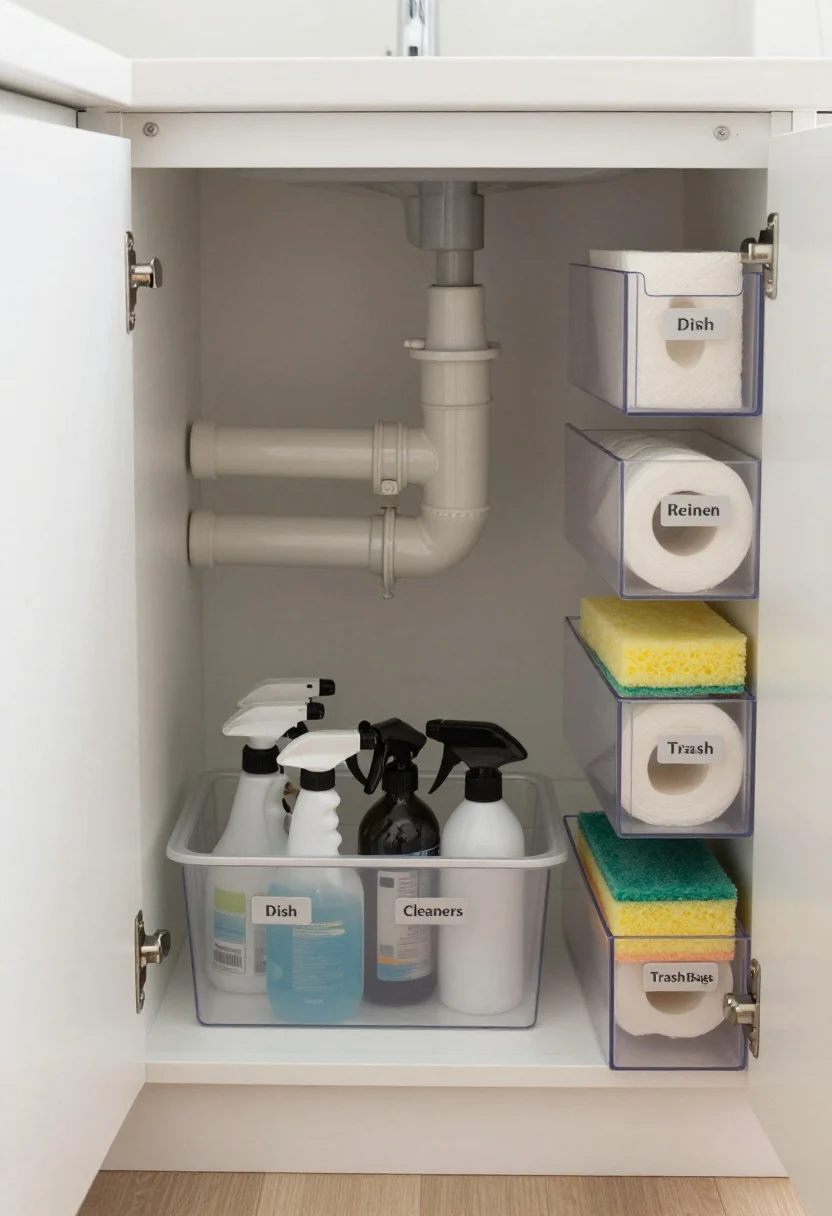
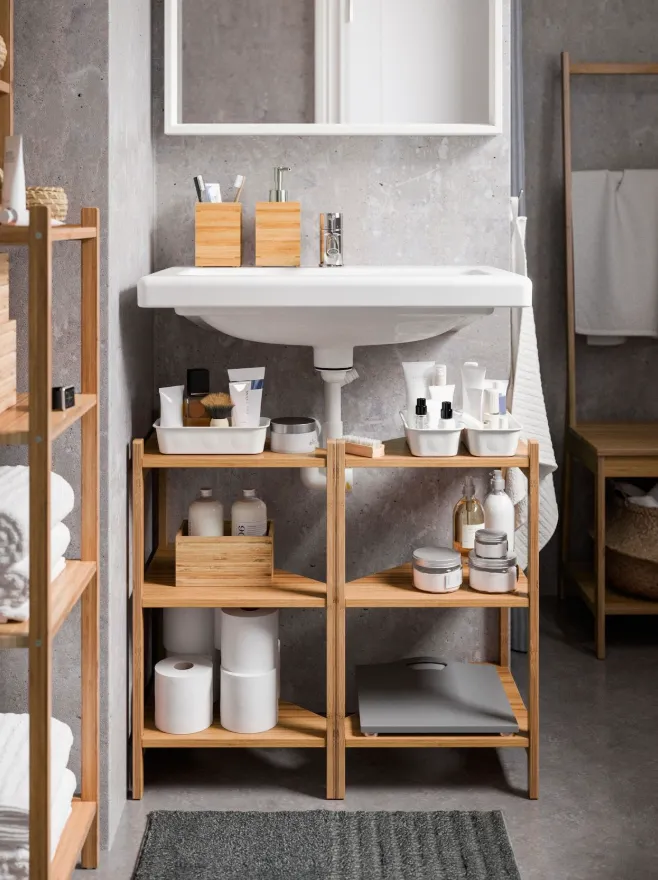
3. Go Vertical With Doors, Walls, And The Back
This image is by AI for inspiration only.
The cabinet doors are prime real estate. I hung slim caddies inside to hold dishwasher pods and scrub brushes—no more avalanche when I open the door. The back wall? Perfect for a small tension rod to hang bottles with trigger sprays.
Maximize The Vertical
- Door caddies: Adhesive or screw-in (just check for clearance).
- Tension rod: Hang lighter spray bottles and keep the floor clear.
- Hooks and clips: Command hooks for gloves and dishcloths; binder clips for opened bags.
Pro tip: Test the door swing with everything installed so you don’t slam a caddy into the frame. FYI, learned that the hard way.
Shop the Look on Amazon
Disclosure: As an Amazon Associate, this site may earn from qualifying purchases.
These product categories fit this article and give readers an easy next step when they are ready to shop.
Follow our WhatsApp Channel for easy bedroom ideas, small-space tips, storage tricks, and budget decor fixes.
Follow on WhatsApp- Base Protector — Shields cabinet floor from leaks and spills.
- Vertical Drawers — Creates tiers around pipes to maximize space.
- Door Storage — Uses door space for pods and brushes.
- Daily Kit — Keeps most-used cleaners grab-and-go.
- Odor Control — Neutralizes musty smells under the sink.
What to shop for: Over-door or adhesive caddies, tension rod, removable hooks.
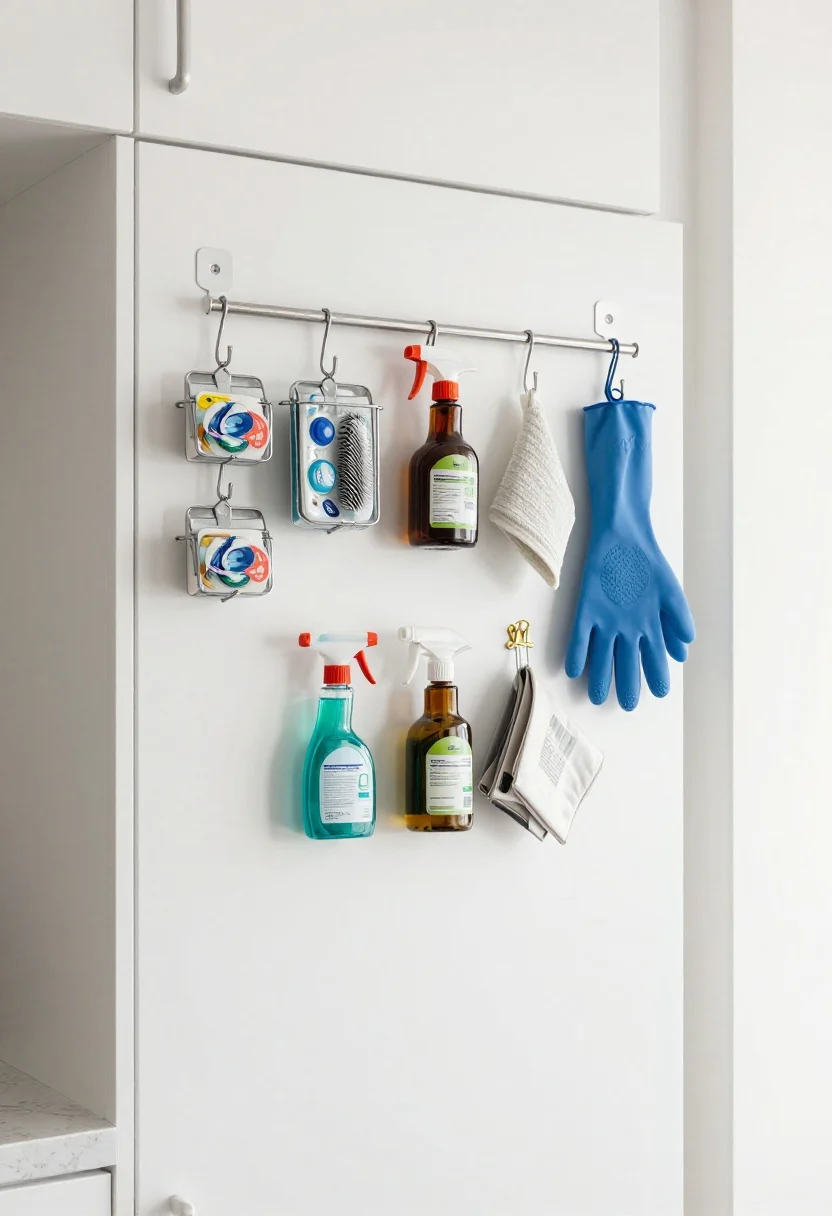
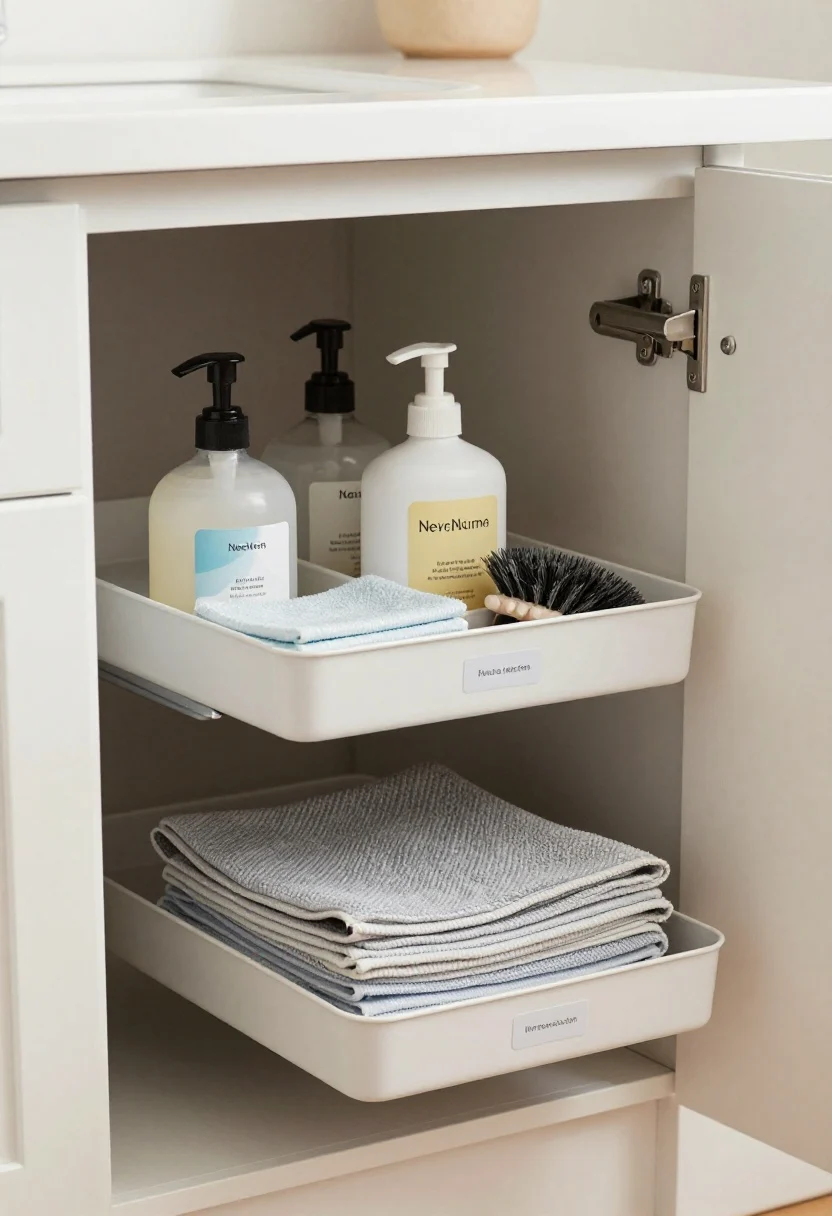
4. Create A “Daily Zone” You Can Grab In Seconds
This image is by AI for inspiration only.
The biggest game-changer? A **pull-out daily caddy**. I keep my most-used items—dish soap, all-purpose cleaner, microfiber cloths, and a small brush—in one portable bin. I slide it out, clean, and slide it back. Easy.
Keep It Friction-Free
- Front and center: Store the daily caddy near the door you open most.
- Decant if it helps: Pump bottles for dish soap reduce drips and look tidy.
- Color-code cloths: One color for kitchen surfaces, another for floors—no germ confusion.
What to shop for: Portable cleaning caddy, pump bottles, microfiber cloth packs.
5. Corral The Awkward Stuff (Trash Bags, Tabs, And Tools)
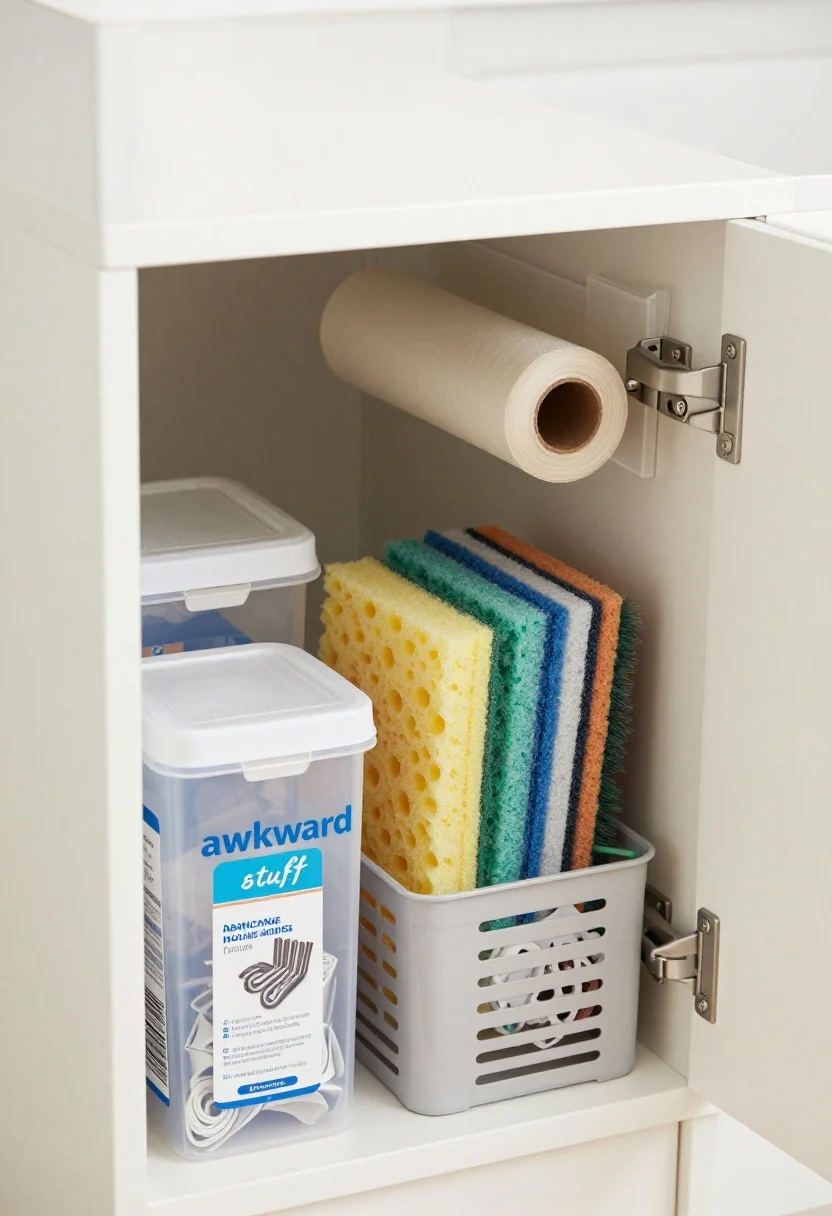
This image is by AI for inspiration only.
Awkward packaging is where mess multiplies. I ditched torn plastic sleeves and moved things into easy-to-pull systems. Trash bags? They live in a magazine file holder now. Dishwasher tabs? In a flip-top container that even sleepy mornings can handle.
Simple Containment Tricks
- Trash bag dispenser: Magazine file or upright bin keeps rolls vertical and snag-free.
- Sponges and brushes: A ventilated bin so they dry out—no mystery stenches.
- Tools and randoms: One small “utility” box for hex keys, appliance manuals, and extra gaskets. Boundaries = bliss.
What to shop for: Magazine files, flip-top food containers, ventilated bins, small lidded box.
6. Make It Pretty Enough To Maintain
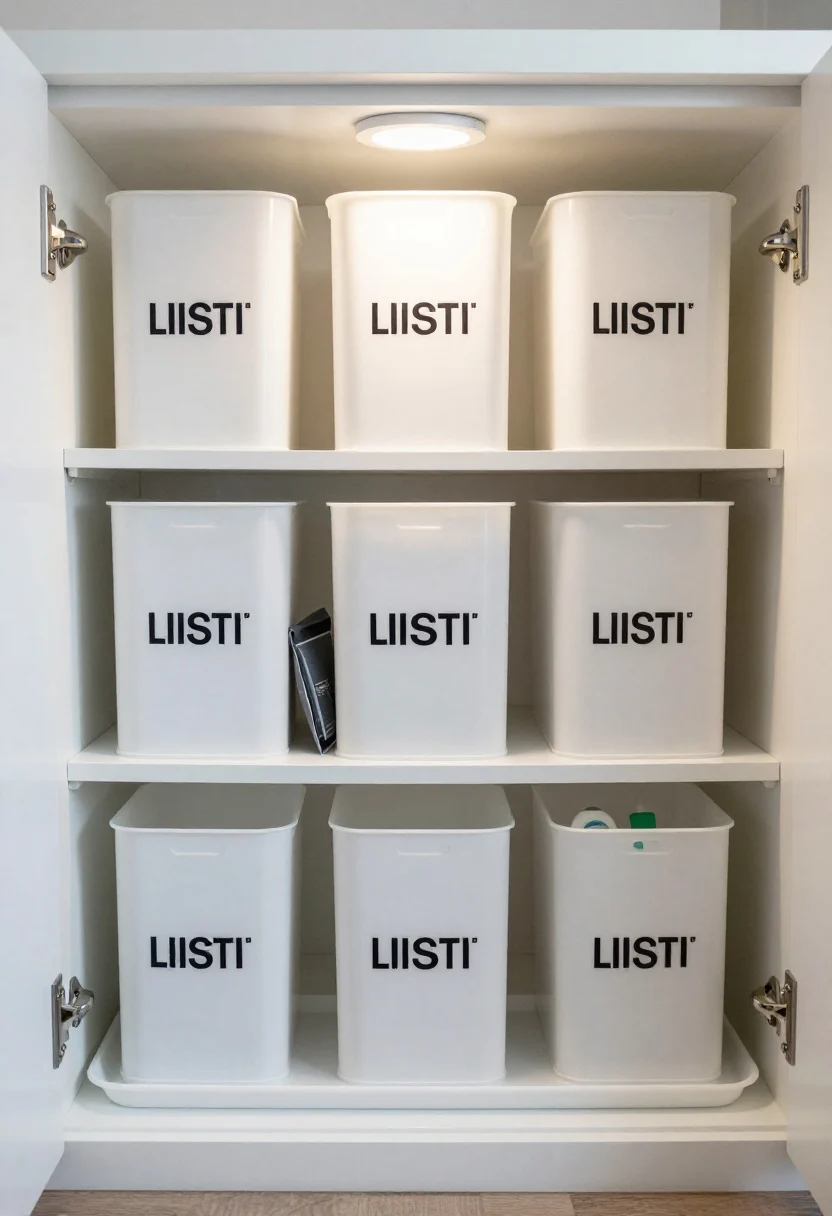
This image is by AI for inspiration only.
Yes, it’s just a cabinet, but aesthetics matter. When something looks good, you’ll keep it that way. I chose **neutral, matching bins**, added simple labels, and stuck a pleasant-smelling charcoal deodorizer in the back. Now it feels clean even when Monday happens.
Style That Serves
- One material palette: Clear or white bins look cohesive and bright.
- Consistent labels: Short, bold words in the same font make it easy for everyone to follow.
- Light and fresh: A stick-on tap light or motion puck brightens the cave; charcoal bags help with odors.
Pro tip: Add a small tray under liquid cleaners as a leak-stop. It’s cheap insurance and looks polished.
What to shop for: Matching bins, charcoal deodorizers, adhesive puck light, small tray.
7. Set A Maintenance Ritual (It Takes Five Minutes)
The secret sauce is maintenance—but make it painless. I do a **monthly five-minute reset**: toss empties, wipe the mat, restock paper towels and tabs, and confirm labels still make sense. If something’s always out of place, it gets its own bin. IMO, organization that evolves is the only kind that lasts.
Keep It Organized, Not Precious
- “One in, one out” rule: Don’t stock five glass cleaners. Pick a favorite and commit.
- Refill stations: Keep backups at the back, always behind current bottles so you use what you have.
- Quarterly check: Review categories. If pet wipes suddenly multiply, they earn a labeled bin.
What to shop for: Refill packs, extra labels, multi-surface wipes if that’s your jam.
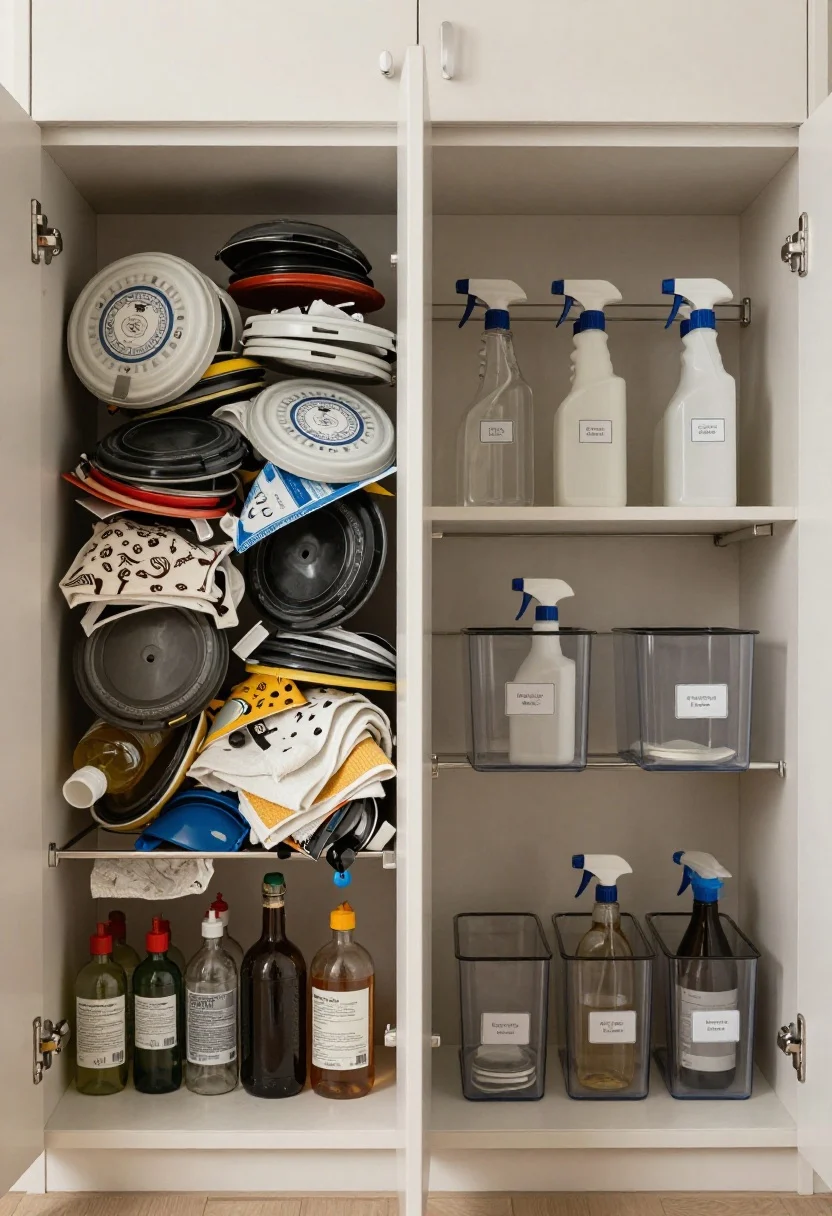
Before And After Vibe Check
- Before: Lost lids, leaky bottles, mystery cloths. High stress, low efficiency.
- After: Clear zones, quick grab-and-go, prettier than it has any right to be.
Conclusion
This image is by AI for inspiration only.
Under-sink organization doesn’t need a full reno or designer budget. With **simple, affordable solutions**—modular bins, door storage, a daily caddy—you’ll turn that chaos corner into a tidy workhorse. Open those doors with pride, friend. Your future self (and your sponges) will thank you.
FAQ
This image is by AI for inspiration only.
How do I organize under the sink if I rent and can’t drill?
Use adhesive caddies, removable hooks, and tension rods. Add a waterproof liner and freestanding bins so everything lifts out cleanly on move-out day.
What’s the safest way to store cleaners under the sink?
Keep chemicals upright in a leak-proof bin or tray, away from food items, and out of reach of kids and pets. Consider a childproof latch on the doors if needed.
How do I prevent that musty under-sink smell?
Line the base, dry sponges in a ventilated bin, and use charcoal deodorizers. If odors persist, check for slow leaks and replace worn gaskets—smells are often a plumbing hint.
Image Credits:All images are used for informational or inspiration purposes only. Some images used in this post are sourced from royalty-free websites like Pixabay or created using Canva Pro. If you are the copyright owner of any image used here and would like it removed or credited, please contact me.
One Comment