
Bathroom Storage Hacks That Make Small Bathrooms Feel Bigger

If you’re searching this, you’re probably trying to make a tiny bathroom look better without wasting money on the wrong organizers, picking a paint color that shrinks the room, or copying a Pinterest-perfect design that doesn’t fit your layout. Good news: you don’t need a gut renovation. You need smart storage that doubles as visual breathing room—clean lines, lighter palettes, vertical moves, and pieces that work harder than they look. Below, seven distinct storage-forward design directions that make small bathrooms feel bigger, with the exact steps, budget notes, and mistakes to avoid.
Quick Answer
To make a small bathroom feel bigger, prioritize vertical and hidden storage: stack shelving over the toilet, add a shallow medicine cabinet, switch to a floating vanity or wall shelves, use a ledge in the shower, and keep the color palette light with consistent finishes. Spend on a quiet-close toilet, a solid-core medicine cabinet, and wall-mounted hardware; save with peel-and-stick tiles, baskets, and paint. Avoid over-decorating—every item needs a job.
1) Clean-Ledge Minimalist: Slim Ledges + Hidden Medicine Storage

This image is by AI for inspiration only.
You want a calm, polished look with zero clutter on the sink—just a few daily-use items tucked away but still easy to grab.
Why it works: Shallow storage creates the illusion of more floor space. A recessed or semi-recessed medicine cabinet sits flush, and a 3–4 inch-deep wall ledge above the backsplash or along the tub gives display without jutting into the room. Fewer thick pieces = cleaner sightlines.
How to do it:
- Palette: Warm white walls (try a soft, neutral white with low LRV in bright rooms; one shade warmer in low-light so it doesn’t go gray), matte black or brushed nickel hardware for quiet contrast.
- Mirror: Choose a framed medicine cabinet (solid core door, soft-close hinges) at least 20–24 inches wide for typical 24–30 inch vanities.
- Ledge: Install a painted MDF or stone ledge (3–4 inches deep) over the sink backsplash or along the tub wall. Keep it continuous for a long horizontal line that visually widens the room.
- Storage: Decant daily items (floss, cotton rounds) into low, lidded jars; tuck extras in the cabinet. Add a slim tray on the ledge to corral essentials.
- Lighting: A low-profile, 3000K–3500K plug-in sconce above the cabinet or two slim vertical sconces flanking it. Aim for 70+ CRI for makeup accuracy.
Budget notes:
- Save: MDF ledge painted in semi-gloss to resist moisture; peel-and-stick wallpaper behind the ledge for a graphic stripe effect.
- Spend: A quality medicine cabinet with real metal hinges and fog-resistant mirror. Cheap ones warp fast in steam.
Best for: Renters, apartments, low-light rooms, narrow powder baths
Mistake to avoid: Overloading the ledge with bottles. More than 3–4 items reads cluttered. Keep extras in the cabinet so the ledge remains a thin, uninterrupted line that makes the room feel wider.
This pared-back approach sets the tone—now let’s add vertical solutions without crowding the floor.
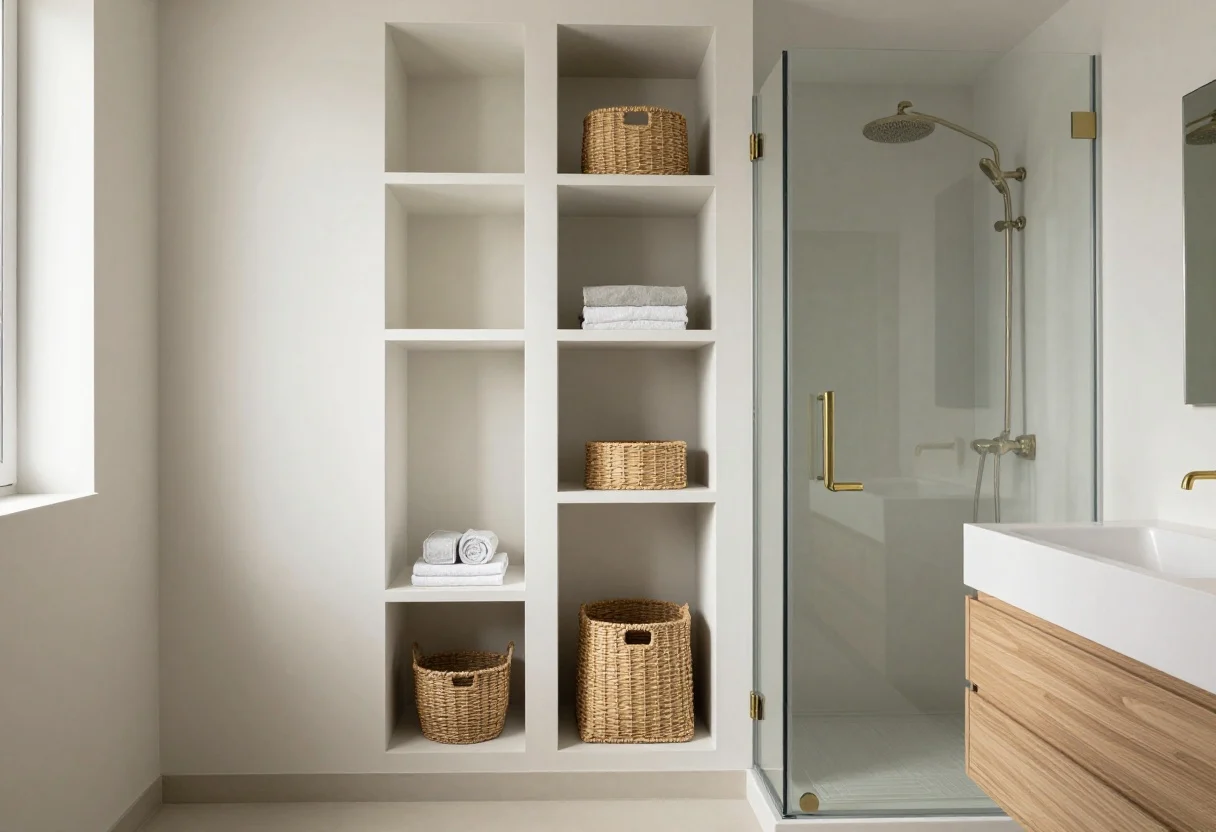
2) Vertical Ladder + Over-The-Toilet Zone: Airy Height, No Bulk

This image is by AI for inspiration only.
Your floor is packed, but your walls are empty—meanwhile towels live on the vanity and everything feels cramped.
Why it works: Elevating towels and bins above the toilet and using a leaning ladder rack pulls storage up the wall, preserving floor space and clearing the vanity. Tall elements draw the eye upward, which tricks the room taller.
How to do it:
- Over-toilet unit: Choose a slim, open-frame shelf set (24–28 inches wide) in matte black or oak finish. Keep shelf depth to 8–10 inches to avoid head bumps.
- Ladder rack: A lightweight oak or bamboo ladder (no hooks required) leaned beside the tub or opposite the vanity. Use the top rungs for hand towels and a lower rung for a hanging basket with washcloths.
- Containers: Two lidded baskets on the top shelf for backup toiletries; one low tray for daily-use hair tools.
- Palette: Keep shelves consistent with hardware—if your pulls are matte black, match the frame so it looks intentional.
- Focal point: Stack three white bath towels and one striped Turkish towel for texture without visual noise.
Budget notes:
- Save: Flat-pack over-toilet frames and IKEA bamboo ladders. Replace plastic feet with clear bumpers to avoid tile scratching.
- Spend: Woven lidded baskets with a firm rim; cheap bins sag and look messy fast.
Best for: Small rooms, renters, families with lots of towels
Mistake to avoid: Buying a cabinet-style over-toilet hutch with deep doors. It bulks out, closes in the room, and you’ll hit your head. Choose open shelves under 10 inches deep.
Once vertical zones feel light, the next trick is getting the vanity off the floor to reveal more visual square footage.
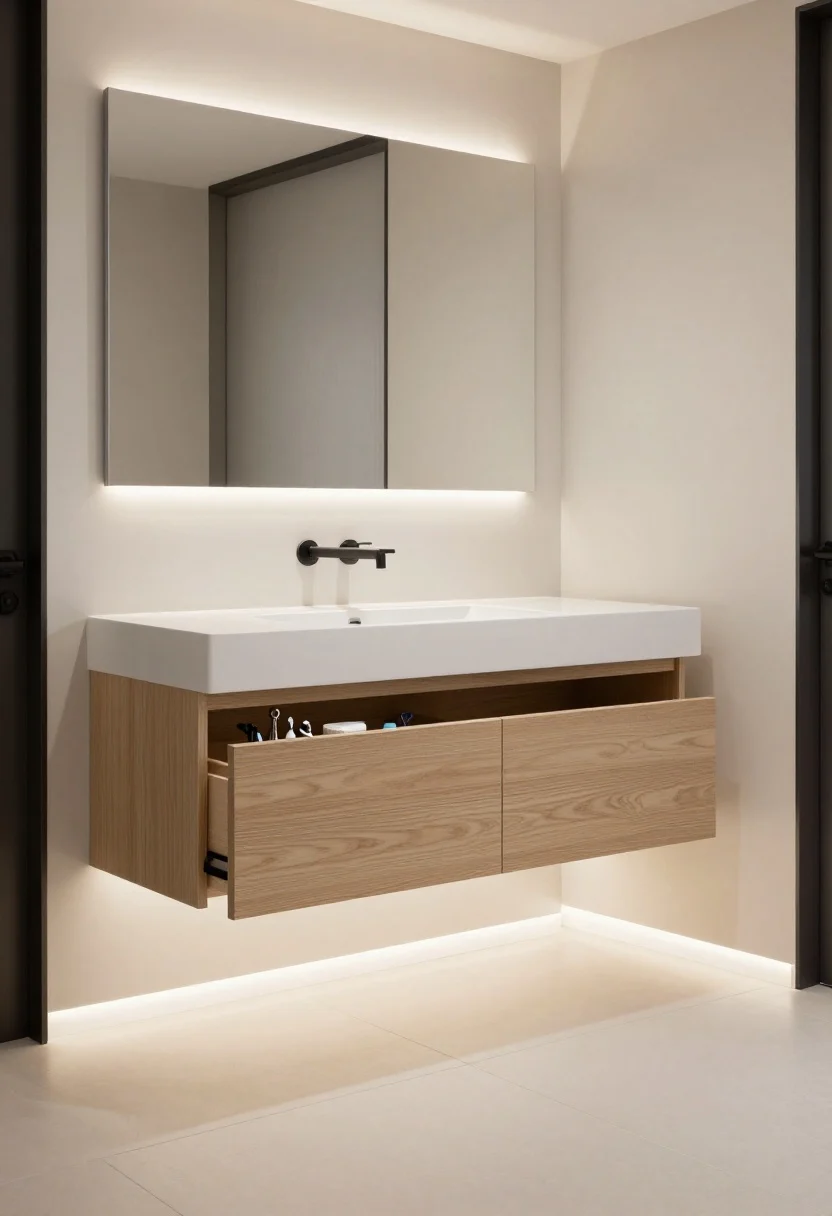
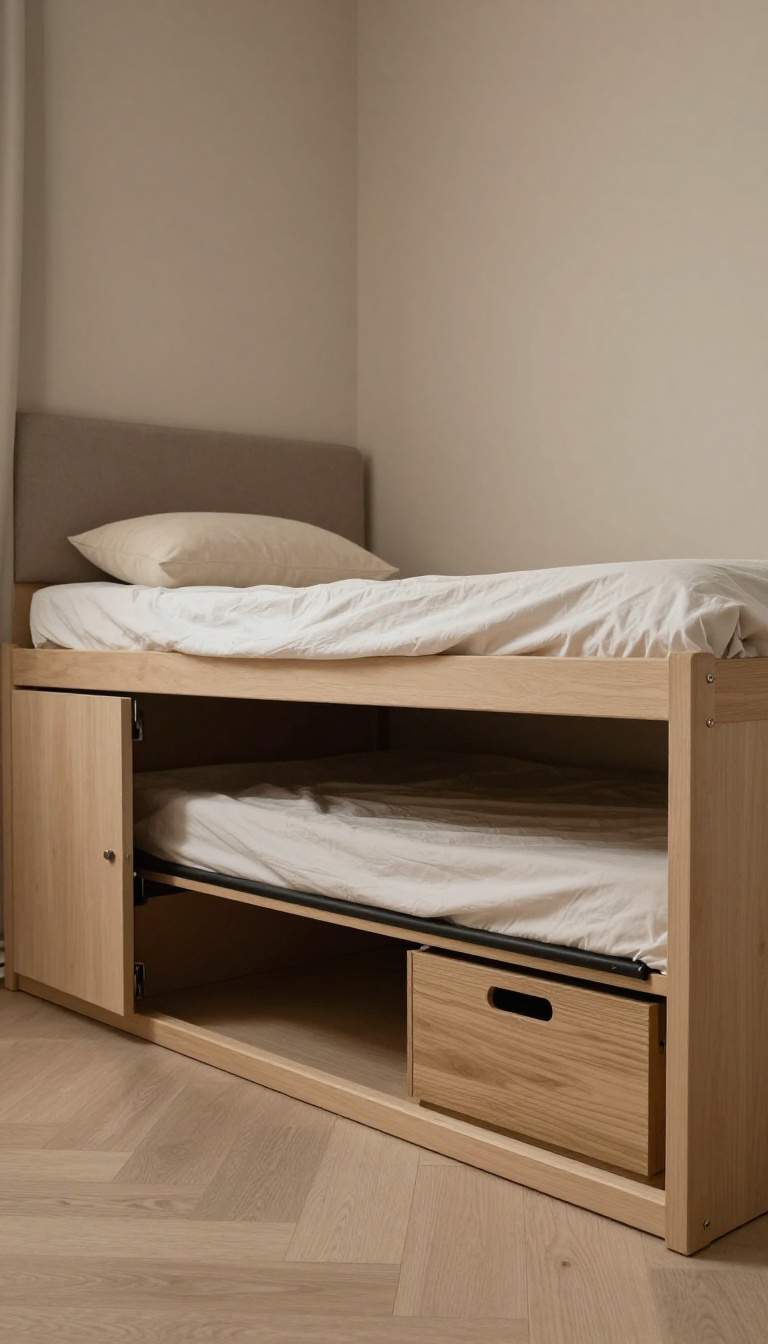
3) Floating Vanity + Under-Glow: Lift The Mass, Light The Perimeter
This image is by AI for inspiration only.
Your vanity blocks everything—cleaners, step stool, scale—and it makes the room feel like a wall of boxy wood.
Why it works: A wall-hung vanity shows more floor and baseboard, which reads as more space. Adding a subtle LED strip under the vanity washes light across the tile perimeter, expanding the perceived footprint.
How to do it:
- Vanity size: For a 5-foot bathroom, a 24–30 inch floating vanity with two drawers is plenty. Opt for slab-front drawers in light oak or matte white.
- Sink: Choose a rectangular undermount or integrated basin for a seamless top—easier to keep clear.
- Lighting: Install a 2700K–3000K LED strip (with diffuser) under the vanity lip. Plug-in and battery strips exist for renters; surface-mount with command strips and route the cable neatly.
- Organization: Drawer dividers for floss, razors, and face cloths; a tall back corner for hair spray. Keep outlets inside the cabinet if possible for hidden charging.
- Tile: Run floor tile under the vanity; a continuous floor is key to the “bigger” illusion.
Budget notes:
- Save: Prefab floating vanity with laminate top; swap pulls to a solid metal T-bar for heft.
- Spend: Soft-close slides and moisture-resistant plywood box; particle board swells quickly in humid bathrooms.
Best for: Homeowners, modern apartments, low-light rooms (because of the LED wash)
Mistake to avoid: Installing the vanity too low. Aim for 32–34 inches top height; too low looks dated and eats legroom visually.
With the heaviest piece floating, it’s time to get serious about shower storage that doesn’t slice the room in half.
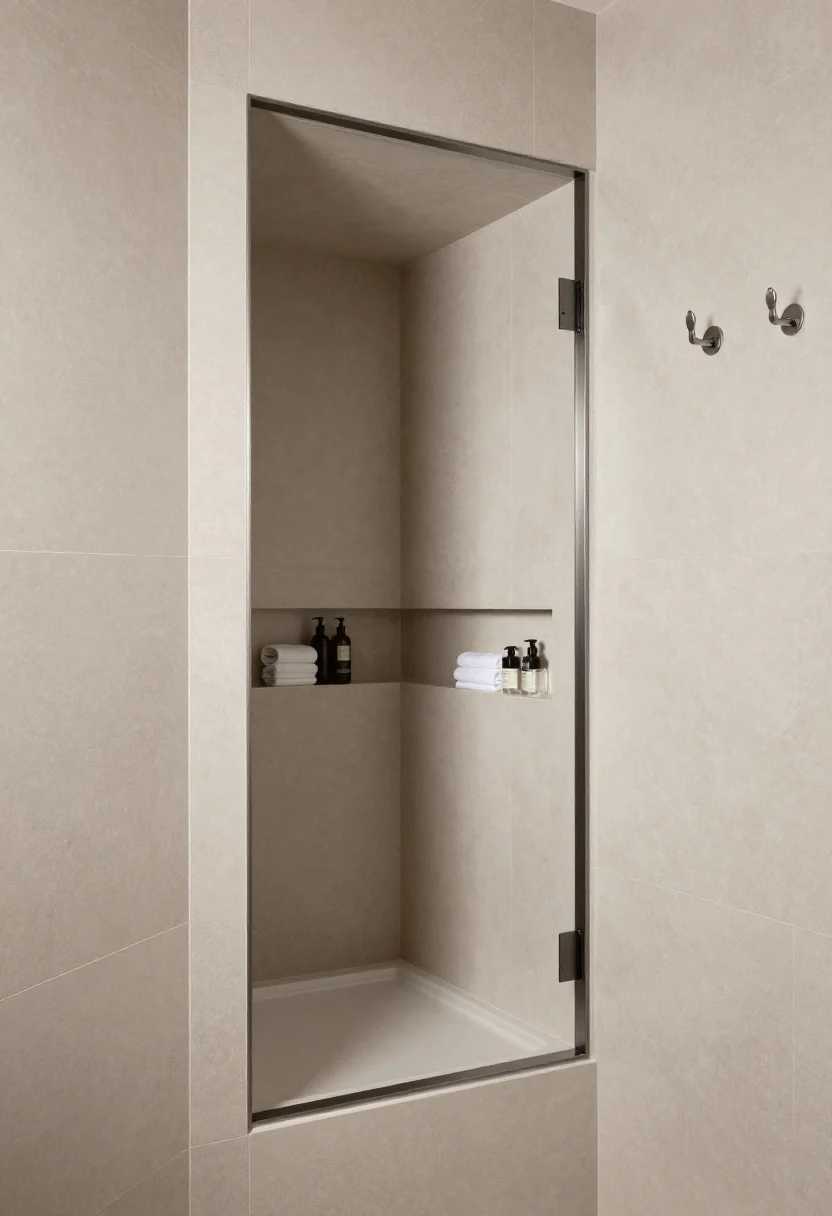
4) Niche + Shelf Combo: Keep Bottles Off the Floor Without a Big Caddy
This image is by AI for inspiration only.
Shampoo bottles on the floor and a hanging caddy on the showerhead make the stall feel cramped and messy.
Why it works: Recessed niches maintain the shower’s internal volume; slim floating shelves outside the shower provide overflow storage without a bulky cart. A horizontal niche visually widens; a vertical niche emphasizes height—match to your proportions.
How to do it:
- Shower niche: Standard 12×24 inches, centered at chest height, with a slight slope for drainage. Finish with a bullnose or a metal edge trim in your hardware finish.
- Overflow shelf: A 6–8 inch-deep wall shelf outside the shower for extras and spare towels. Keep it at eye level to avoid accidental bumps.
- Color continuity: Use the same tile inside the niche or a slightly darker shade for depth without a harsh frame.
- Hooks: Two robe hooks outside the shower at 66–68 inches high for fast drying; keeps towels off bars that eat wall space.
Budget notes:
- Save: Prefab niche insert during a minor update; paint or tile the interior yourself with peel-and-stick tile if you’re renting (only on smooth fiberglass walls, and check moisture limits).
- Spend: Proper waterproofing (KERDI or similar). Leaks cost more than tile ever will.
Best for: Families, small rooms with narrow showers, homeowners
Mistake to avoid: Tiny mosaic tile in the niche with too many grout lines—it looks busy and dates quickly. Choose a larger format or a simple slab for a cleaner read.
Next, get strategic with mirrors and light: the least expensive visual expander you can add today.
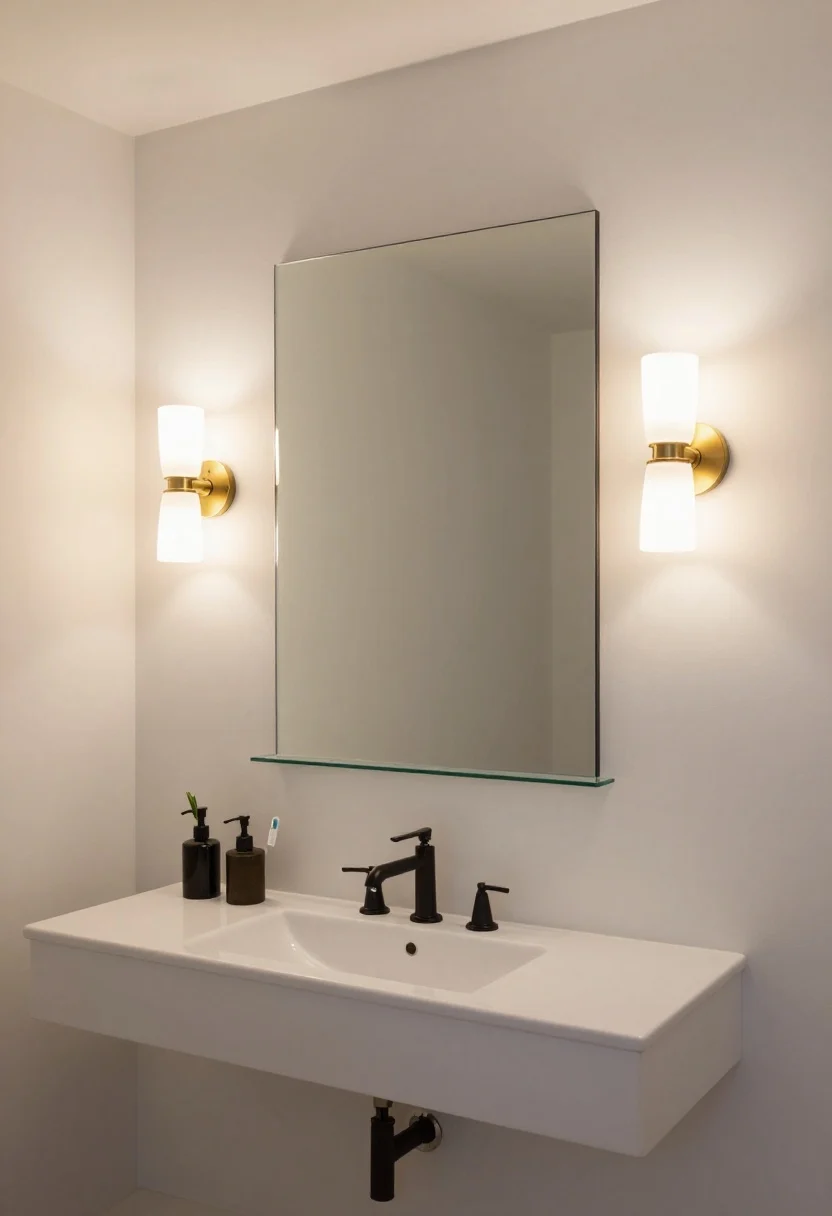
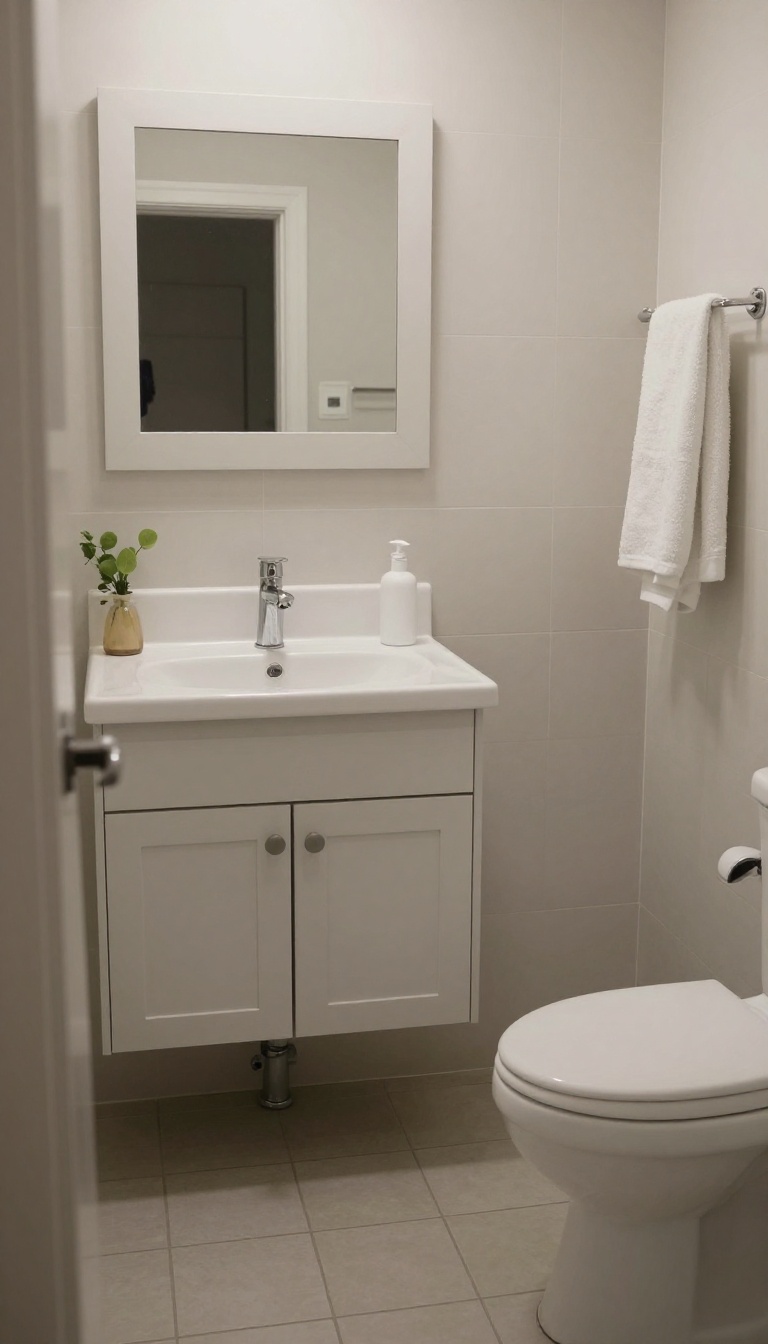
5) Big Mirror + Side Sconces: Light the Face, Stretch the Wall
This image is by AI for inspiration only.
A small frameless mirror floats in a big empty wall, and the overhead light casts shadows while the counter stays cluttered.
Why it works: A large mirror expands the field of view and bounces light around. Side-mounted sconces (or slim plug-ins) reduce facial shadows and free the overhead fixture to do ambient work. Combined with a slim shelf below, you gain both storage and visual width.
How to do it:
- Mirror: Go as wide as the vanity or even 2–3 inches wider on each side if wall space allows. Height: 34–40 inches to reflect more light and line of sight.
- Sconces: Mount at 60–66 inches off the floor, 28–32 inches apart, depending on mirror width. Choose frosted glass or fabric shades for soft diffusion.
- Slim shelf: Add a 3-inch glass or wood shelf under the mirror to hold hand soap, toothbrush cups, and a small plant. Keep it aligned with the mirror’s bottom edge.
- Finish coherence: Repeat a single metal—brass or black—on sconces, faucet, and shelf brackets for a tailored look.
Budget notes:
- Save: Use a plain, large builder-grade mirror and add clip-on brass edges (frame kits) for a finished feel.
- Spend: Plug-in sconces with real metal arms and replaceable bulbs; cheap integrated LEDs can yellow unevenly over time.
Best for: Low-light rooms, renters (plug-ins), small rooms that need more visual width
Mistake to avoid: Mounting sconces too high so light hits scalp, not face. Keep the center of the bulb roughly at eye level for most users.
Once the mirror multiplies space, add concealed capacity right where you usually dump items: above the door and behind it.
6) Doorframe Loft Shelf + Back-of-Door System: Space You Forgot You Had
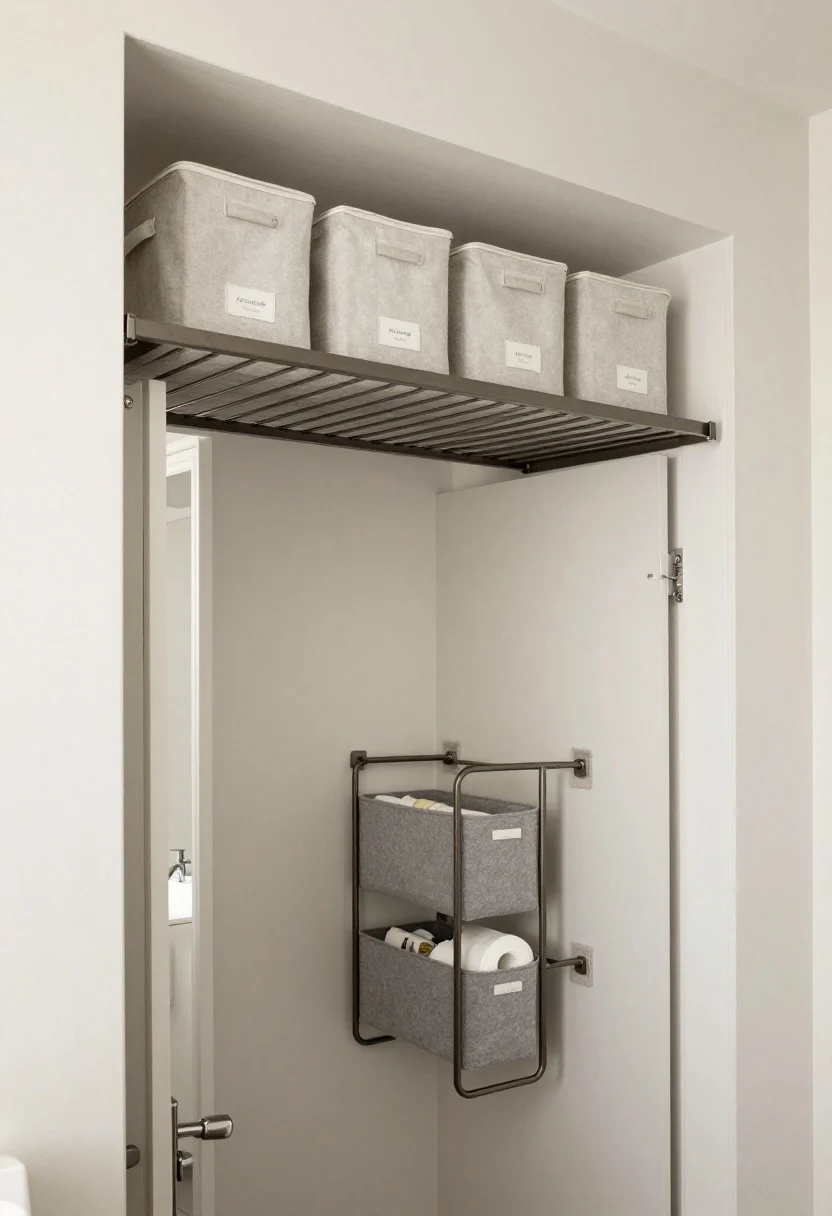
This image is by AI for inspiration only.
You have no closet, no linen cabinet, and towels end up on the tub edge or draped over the radiator.
Why it works: The dead zone above the door and behind it offers deep but out-of-sight storage for bulk items. Elevating surplus frees eye-level areas to stay clean, which makes the room read larger even if the footprint hasn’t changed.
How to do it:
- Loft shelf: Install a 10–12 inch-deep shelf across the doorframe at 78–82 inches high (check ceiling height). Use brackets rated for 50+ pounds. Store backup paper goods and spare towels in matching bins.
- Back-of-door rack: Choose a low-profile metal system with adjustable baskets (4–6 inches deep). Mount into the door frame or use over-door hooks with felt pads to protect paint.
- Labeling: Neutral labels on bins stop rummaging chaos; keep identical containers for a clean visual line when the door opens.
- Safety: Confirm the door can still swing fully without hitting the toilet or vanity; measure clearance with baskets installed.
Budget notes:
- Save: Pine shelf painted to match trim; powder-coated over-door rack kits.
- Spend: Solid brackets (steel L-brackets) and proper anchors for plaster or tile walls. Upgrade bins to lidded fabric with rigid inserts for stackability.
Best for: Families, renters, apartments with zero linen storage
Mistake to avoid: Using open wire baskets for tiny items—things slip and look messy. Line them with felt or use solid bins for small toiletries.
For the final move, unify cleaning tools and laundry without a clunky hamper stealing floor space.
7) Narrow Tower + Rolling Hamper Drawer: A One-Stop Utility Column
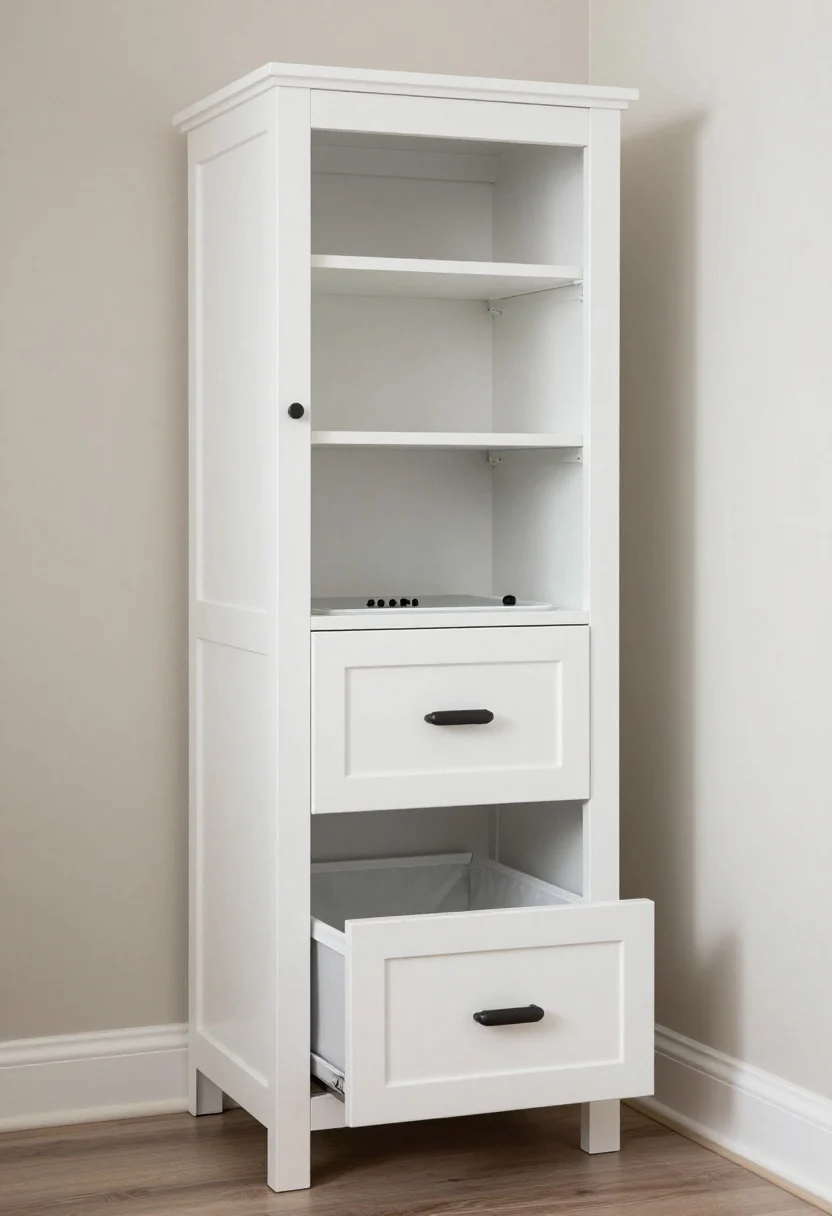
This image is by AI for inspiration only.
Dirty clothes, extra toilet paper, and a hair dryer are always in the way—and a round hamper eats valuable walking space.
Why it works: A 12–16 inch-wide tower with a tilt-out or rolling hamper drawer stacks vertical storage while keeping laundry contained behind a door. Closed fronts read as wall, not clutter. Drawers above organize tools neatly.
How to do it:
- Cabinet: Slim, full-height cabinet (at least 12 inches deep) with two adjustable shelves on top, a middle drawer for tools, and a bottom tilt-out hamper with a removable bag.
- Placement: Tuck it near the vanity or between toilet and wall if you have a 14–16 inch gap. Ensure door swing clears.
- Hardware: Match pulls to the vanity, ideally matte black T-bars or brushed nickel finger pulls to keep lines minimal.
- Inside setup: Heat-safe silicone mat for hot tools in the drawer; cord wrap hooks inside the door; vertical dividers for cleaners.
Budget notes:
- Save: Flat-pack pantry cabinet adapted with a tilt-out hamper kit; add furniture feet to visually lighten it.
- Spend: Moisture-resistant finish and soft-close hardware; cheaper melamine chips near water.
Best for: Homeowners, small rooms that need closed storage, shared bathrooms
Mistake to avoid: Going too deep. More than 16 inches makes it feel like a closet intruding into the bath. Stay shallow and tall so it feels like architecture.
With seven distinct moves covered, here’s how they compare at a glance.
| Design | Best For | Key Feature | Budget Tip |
|---|---|---|---|
| Clean-Ledge Minimalist | Renters, narrow baths, low-light rooms | Shallow ledge + quality medicine cabinet | Use MDF ledge and upgrade the cabinet hinges |
| Vertical Ladder + Over-The-Toilet Zone | Families, apartments | Open-frame shelves under 10 inches deep | Flat-pack frames + durable lidded baskets |
| Floating Vanity + Under-Glow | Homeowners, modern apartments | Wall-hung vanity with perimeter LED | Prefab cabinet; spend on soft-close slides |
| Niche + Shelf Combo | Homeowners, narrow showers | 12×24 recessed niche with metal edge trim | Prefab niche; invest in waterproofing |
| Big Mirror + Side Sconces | Low-light rooms, renters | Mirror as wide as vanity + plug-in sconces | Frame a builder mirror; buy real-metal sconces |
| Doorframe Loft Shelf + Back-of-Door System | Families, small apartments | 10–12 inch shelf above door + adjustable rack | Painted pine shelf; lined wire baskets |
| Narrow Tower + Rolling Hamper Drawer | Homeowners, shared baths | 12–16 inch tower with tilt-out hamper | Adapt a pantry cabinet; moisture-resistant finish |
This image is by AI for inspiration only.
What To Buy / What To Skip
- Buy: Solid metal hardware (matte black or brushed nickel). Skip: Hollow, plated pulls that pit fast.
- Buy: Soft-close, moisture-resistant cabinets. Skip: Particle board boxes near tub/shower.
- Buy: Plug-in sconces or LED strips with 3000K bulbs. Skip: Single harsh overhead light.
- Buy: Lidded baskets with rigid sides. Skip: Floppy bins that collapse and look messy.
- Buy: Recessed or framed medicine cabinet. Skip: Tiny mirror + countertop organizers doing all the work.
Common Designer Mistakes
- Too many finishes: Mixing chrome faucet, brass sconces, black pulls, and nickel shower trim makes a small room look chaotic. Pick one metal and repeat.
- Deep shelves at eye level: Anything over 10 inches deep above the toilet or next to the vanity feels like a head hazard.
- Dark grout with busy tile: High-contrast grids can shrink walls visually. If you love pattern, keep grout close to tile tone.
- Over-furnishing: A floor cart plus hamper plus stool equals clutter. Choose one multitasker.
- Ignoring lighting temperature: Mixed 2700K and 4000K bulbs make finishes look off. Keep all bulbs within 3000K ± 300.
Budget-Friendly Alternatives
If you can’t renovate or drill into tile, here are renter-safe swaps that still make a small bathroom feel bigger:
- Fake the floating vanity look by painting the vanity and swapping chunky baseboards for a paint-matched toe-kick. Add an under-cabinet battery LED strip.
- Use peel-and-stick vinyl planks on the floor only if humidity permits (check product rating). Choose a light, low-contrast wood tone to expand the footprint visually.
- Replace a tiny mirror with a large, command-strip-mounted mirror panel; add two plug-in swing-arm sconces for side light.
- Lean a bamboo ladder for towels; add over-toilet shelves that wedge between floor and ceiling with tension poles.
- Back-of-door over-the-door racks rather than drilling walls, with felt pads to protect paint.
FAQ
1) What color should I paint a small bathroom to make it feel bigger?
Choose a light, warm white or very pale greige with a satin or semi-gloss finish for light bounce. If the room has no natural light, avoid blue-leaning whites (they can look cold); pick a creamy neutral around 70–80 LRV.
2) How deep can shelves be above a toilet without feeling cramped?
Stick to 8–10 inches deep. Any deeper risks head bumps and makes the wall feel heavier.
3) Is a pedestal sink better than a vanity for small bathrooms?
Only if you have other closed storage. A small floating vanity with drawers almost always reads larger because it hides clutter and shows more floor.
4) Where should I put towels if I don’t have wall space for a bar?
Use a leaning ladder rack, two robe hooks at 66–68 inches high, or a back-of-door hook rail. Fold spares into a basket on an over-toilet shelf.
5) What’s worth splurging on in a tiny bathroom?
Soft-close, moisture-resistant cabinetry; a solid medicine cabinet; good lighting (side sconces or under-vanity LEDs). These control clutter and make finishes look better.
If you’re deciding where to start, pick one or two of the hacks above that match your layout and budget. Clean-ledge minimalism plus a big mirror creates immediate breathing room. Adding a floating vanity or a narrow utility tower hides the rest. The right combination turns storage into architecture—so your small bathroom not only holds more, it also looks bigger. That’s the real win with bathroom storage hacks that make small bathrooms feel bigger: fewer bulky pieces, more thoughtful inches, and a room that finally works as hard as you do.
Before You Start: Quick Decorating Checklist
- Measure the room before buying furniture or storage pieces.
- Choose one main focal point so the space does not feel busy.
- Repeat at least one finish, texture, or color to make the room feel intentional.
- Check lighting temperature, traffic flow, and cleaning needs before copying the look.
Helpful Product Ideas To Compare
Affiliate disclosure: Some links may be affiliate links. Compare size, material, reviews, and return policy before buying.
- Shop Bathroom Storage Hacks Make Decor — useful for checking price ranges, finishes, and real customer photos.
- Shop Bathroom Storage Hacks Make Storage — useful for checking price ranges, finishes, and real customer photos.
- Shop Bathroom Storage Hacks Make Lighting — useful for checking price ranges, finishes, and real customer photos.
Image Credits:All images are used for informational or inspiration purposes only. Some images used in this post are sourced from royalty-free websites like Pixabay or created using Canva Pro. If you are the copyright owner of any image used here and would like it removed or credited, please contact me.


2 Comments