Easy Bathroom Storage Hack for a Clutter-free Space

You shuffle into the bathroom, step over a shampoo bottle, and dig through a basket for the one face serum that always hides. The common mistake? Treating your bathroom like a closet without shelves—lots of stuff, nowhere specific to put it. The result you want is simple: a clean counter, faster mornings, and a space that doesn’t make you sigh. This guide will help you decide what to add, what to skip, and how to arrange it so your bathroom finally stays tidy—without a remodel.
| Idea | Best For | Budget Level | Mistake To Avoid |
|---|---|---|---|
| Over-the-toilet shelving | Small bathrooms with tight floor space | $-$$ | Too deep shelves that crowd traffic |
| Magnetic strip inside cabinet | Tiny tools and grooming clutter | $ | Adhesive on cheap paint that peels |
| Back-of-door rack | Shared baths and renters | $-$$ | Hanging wet towels with dry paper goods |
| Shower caddy corner pole | Multiple shampoo users | $$ | Using low-tension poles that slip |
| Drawer dividers + labels | Vanities with chaotic drawers | $-$$ | Mixing liquids and heat tools |
| Floating shelves with baskets | Visual calm and guest baths | $$ | Open storage without decanting |
| Rolling cart “landing zone” | Windowless baths lacking cabinets | $$ | Choosing a cart too wide for doorways |
This image is by AI for inspiration only.
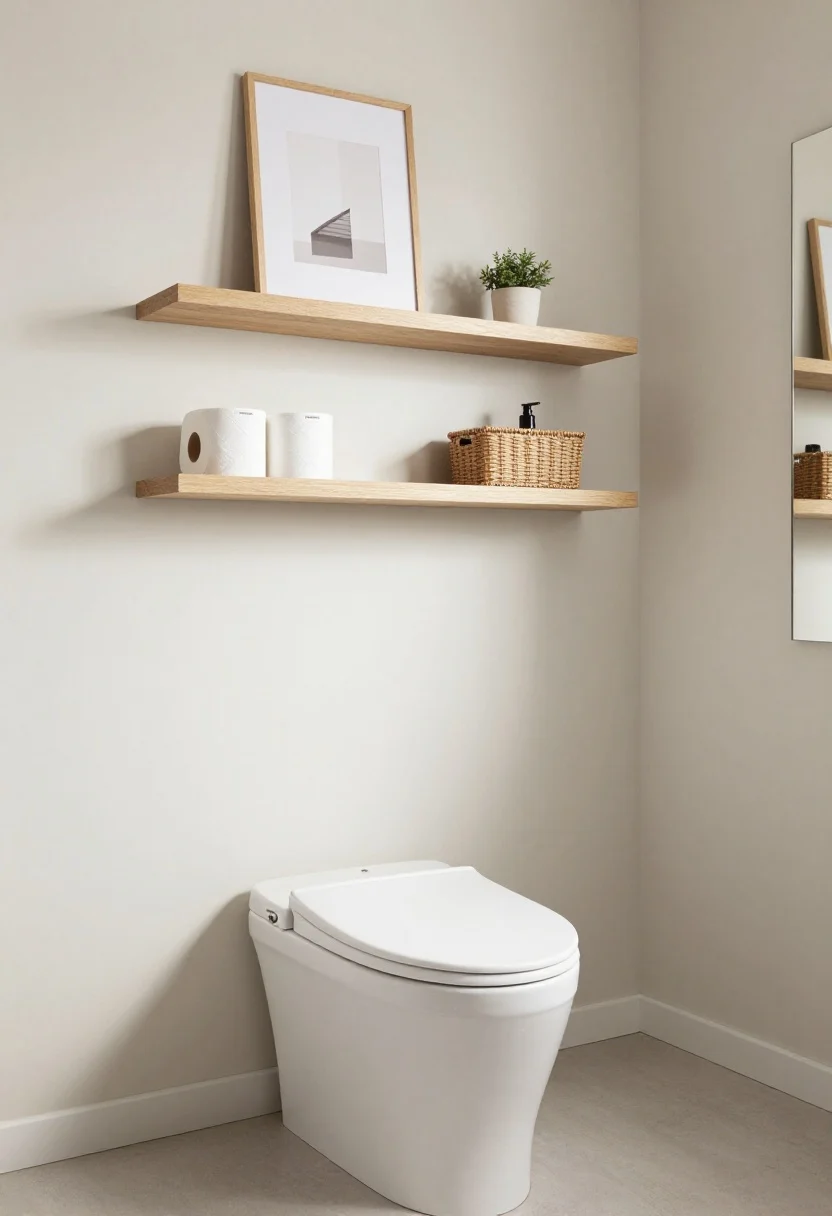
1. Turn Dead Wall Space Over the Toilet into a Quiet Workhorse
This image is by AI for inspiration only.
Picture the zone above your toilet: usually a blank wall or a dusty art print that does nothing for storage. You need a place for extra rolls, hand towels, and the hairdryer you keep stashing under the sink.
Why this works: It uses vertical space where there’s no foot traffic. The eye reads the top third of the room as visual breathing room, so if you keep these shelves light in color and shallow in depth, the bathroom will still feel open. The right furniture scale matters: 6–8 inches deep is usually enough for folded towels, jars, and toilet paper without crowding your headspace.
- Measure 24–30 inches above the toilet tank to the base of the first shelf; leave 2 inches clearance to lift the tank lid.
- Choose either a freestanding over-the-toilet unit (adjustable feet help on tile) or two floating shelves rated for 15–25 lbs each.
- Use lidded baskets or canisters: one for extra rolls, one for skincare backstock, one for guest items. Label underneath the lid lip if you dislike visual labels.
- Style the top shelf with one plant (real or faux) and a small framed print; keep 40–50% of the shelf as negative space.
Mistake to avoid: Deep shelves. Anything beyond 9 inches invites bumped shoulders and a cramped look. If your wall is tiled, use masonry anchors or a freestanding unit to avoid drilling. This vertical setup balances nicely with a slim mirror upgrade, which we’ll reference in the next idea.
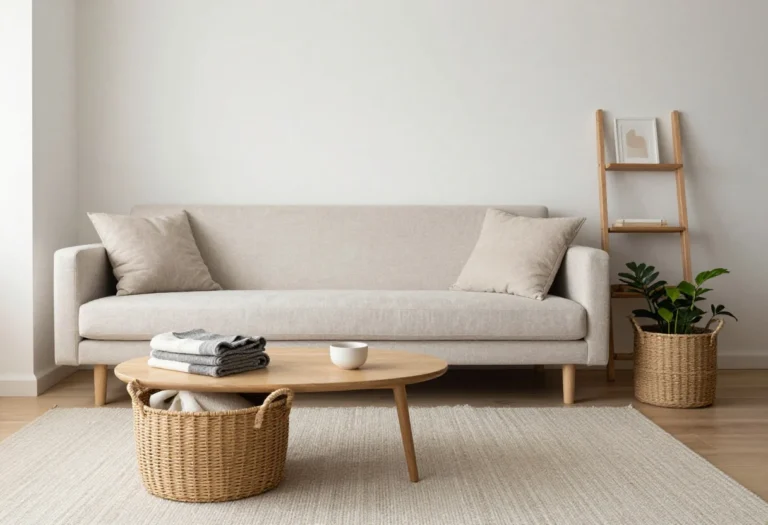
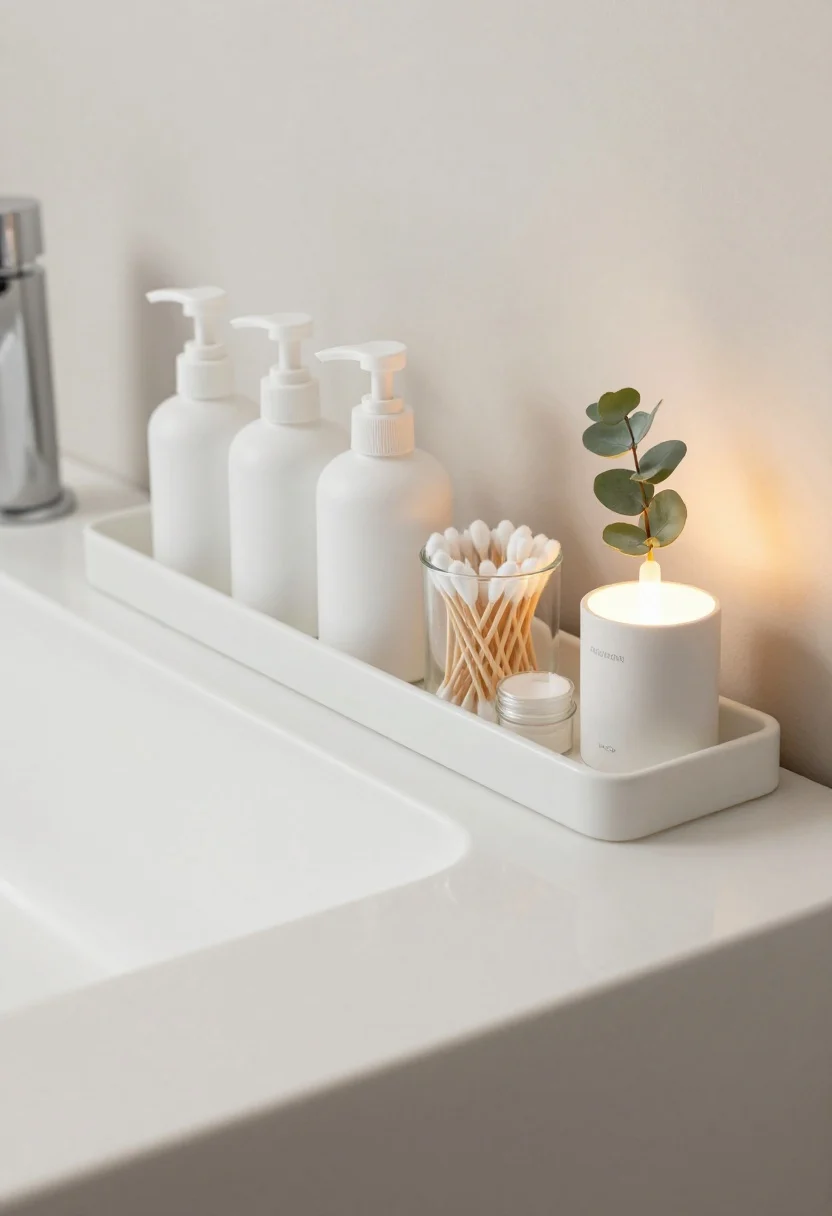
2. Keep Counters Clear with a Slim Sink-Side “Landing Zone”
This image is by AI for inspiration only.
Your morning routine spills across the vanity: toothpaste, three cleansers, cotton pads. You wipe the counter, but the clutter returns by dinner.
Why this works: A narrow tray or lipped catchall creates a visual boundary—what’s not on the tray doesn’t live on the counter. This plays on layout and focal point: consolidating items into one defined rectangle reads as “intentional styling” rather than mess. Add a small lamp (3000K warm LED) to soften lighting and make early mornings feel calmer.
- Pick a tray no wider than a third of your countertop depth (typically 6–8 inches for standard vanities) with a lip to contain spills.
- Decant daily-use liquids into uniform pump bottles—matte white or amber glass reduces label noise.
- Add one vertical element like a bud vase or rechargeable mini lamp to shift the eye up and away from product labels.
- Limit the tray to 5–7 items: cleanser, lotion, floss, cotton swabs in a sealed jar, plus the decorative element.
Budget note: Shop kitchen aisle options: a narrow bread pan or cutlery organizer lines can be more affordable and water-resistant. Avoid wood without a waterproof finish; water rings are inevitable. This surface-level control pairs well with drawer organization beneath it.
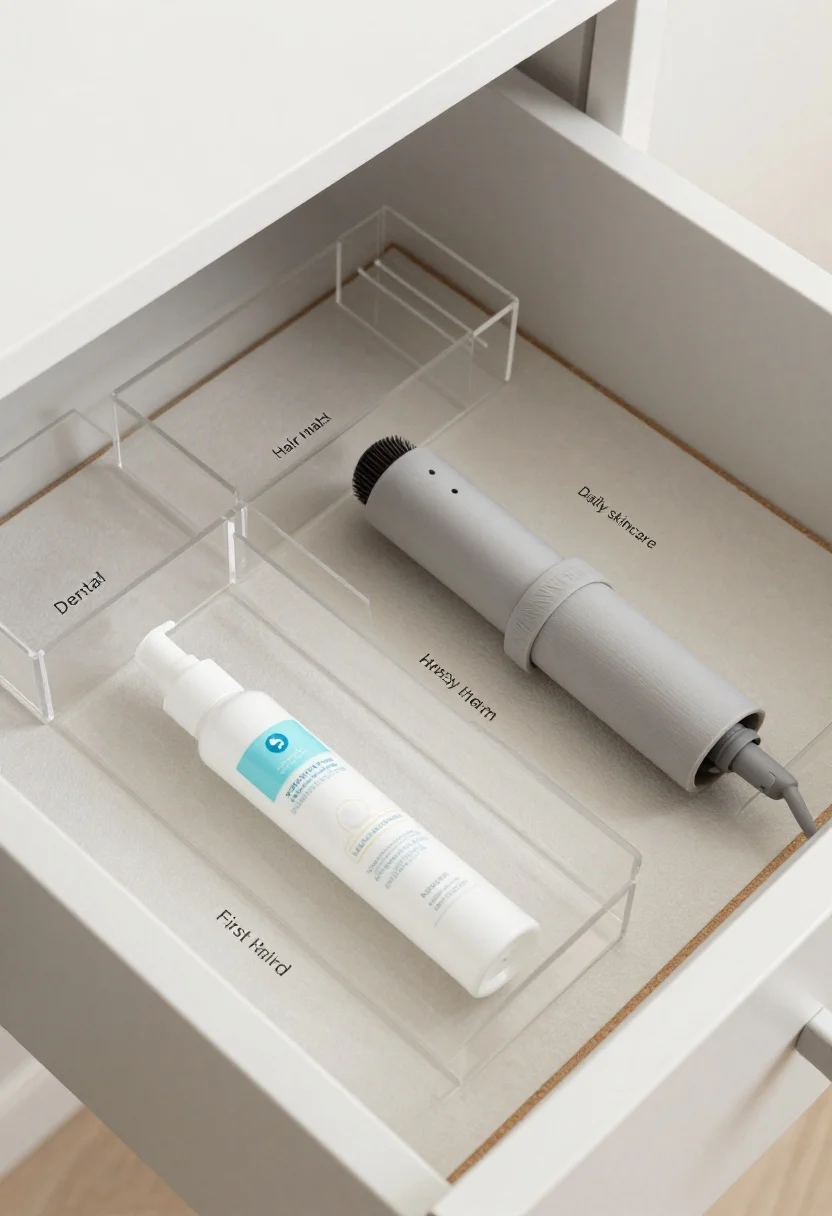
3. Divide and Conquer Drawers So the Right Thing Is Reachable
This image is by AI for inspiration only.
That deep vanity drawer holds everything: razors, bandages, lip balm, travel minis, and a curling wand that snags cords around the hinges.
Why this works: Dividers enforce categories and reduce micro-decisions. Storage is only useful if it respects traffic flow—morning items at the front, weekly treatments toward the back. Mixing textures (rubber feet on bins, felt or cork liners) keeps organizers from sliding and reduces clatter, which subtly lowers stress.
- Empty and measure the interior (length, width, and clearance height including the drawer slide). Sketch a simple grid.
- Buy modular acrylic or bamboo organizers in 3–4 sizes; add a non-slip drawer liner underneath.
- Create zones by task: dental, daily skincare, hair tools, first aid. Label the base of each bin or the top lip facing up.
- Heat tools get their own heat-safe sleeve or silicone mat, placed on the right if you’re right-handed to reduce crossover traffic.
Mistake to avoid: Loose cords. Use a silicone cable tie and store heat tools only when cool. If your drawer is shallow (<3 inches), mount a heat-tool holster on the inner cabinet door instead. With your drawers streamlined, the shower area is the next big clutter magnet.
4. Stop the Shower Avalanche with a Corner Pole Caddy That Doesn’t Slip
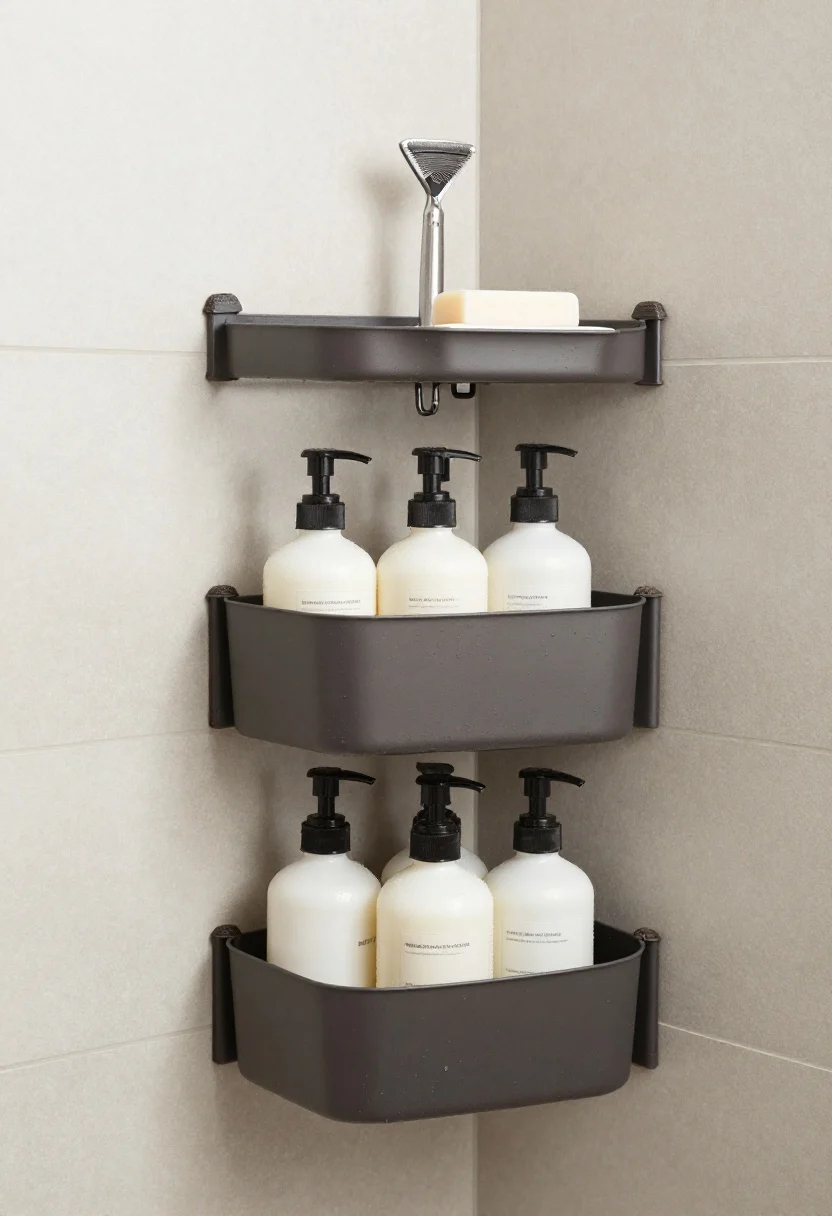
This image is by AI for inspiration only.
Shampoo bottles slide off the tub ledge, razors play hide-and-seek, and that bar of soap leaves a sticky film along the tile edge.
Why this works: A tension corner pole uses vertical space in the least obtrusive zone of your shower, keeping bottles at reachable heights while preventing water pooling. Choose metal with rust-resistant coating; matte finishes hide water spots better than chrome. Basket depth and spacing create a comfortable reach and keep labels facing forward for quick grabs.
- Measure floor-to-ceiling height precisely; buy a pole with 2–3 inches of adjustability and anti-slip rubber end caps.
- Pick a model with at least three baskets: eye-level for shampoo/conditioner, lower for body wash, top for spares or razors with a hook.
- Place bar soap on a removable draining dish. Add a suction razor holder to free up basket space.
- Group by user or function; decant into identical pump bottles for a cleaner visual if you share the shower.
Mistake to avoid: Cheap poles that bow or slip on glossy tile. Look for poles with internal springs rated for your ceiling height and >10 lb per shelf. If your tiles are textured, test suction accessories before committing. Once the shower is calm, the back of the door turns into an unsung hero.
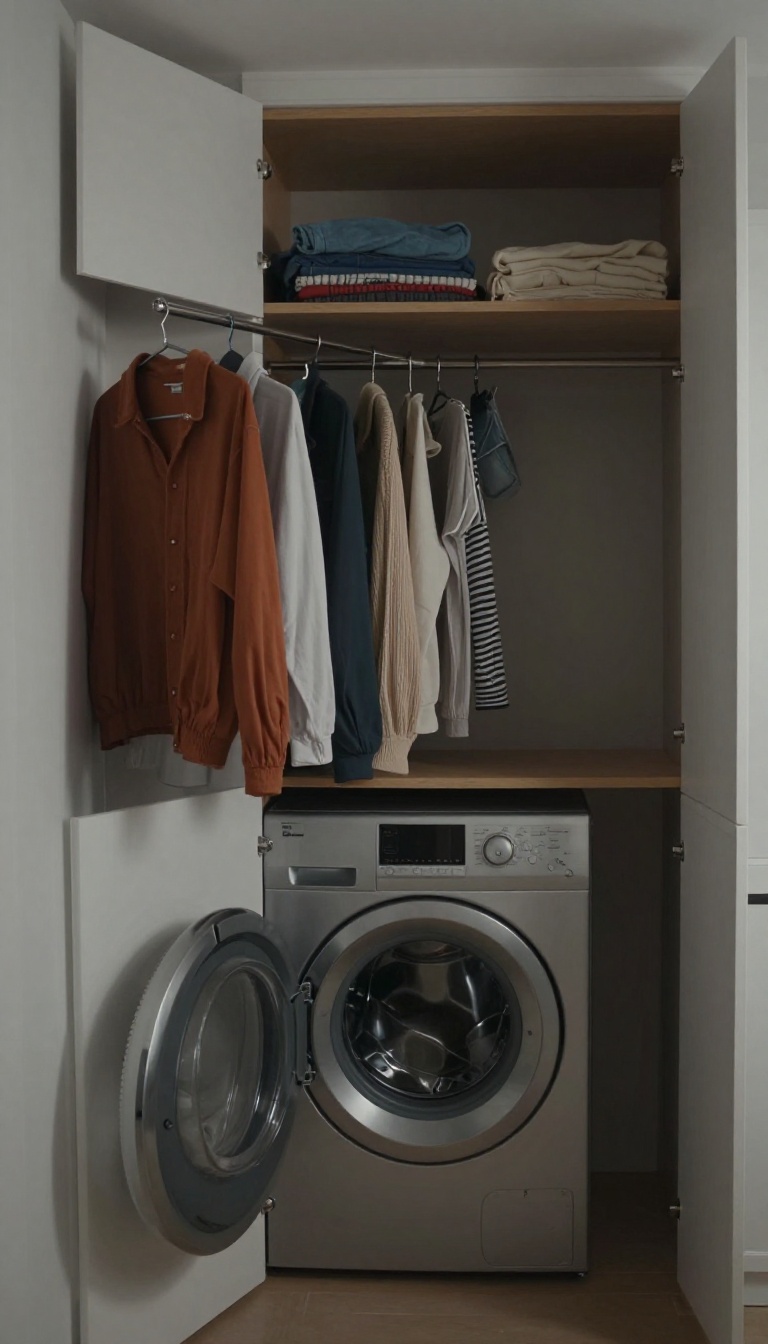
5. Put the Back of the Door to Work Without Making It Look Like a Locker Room
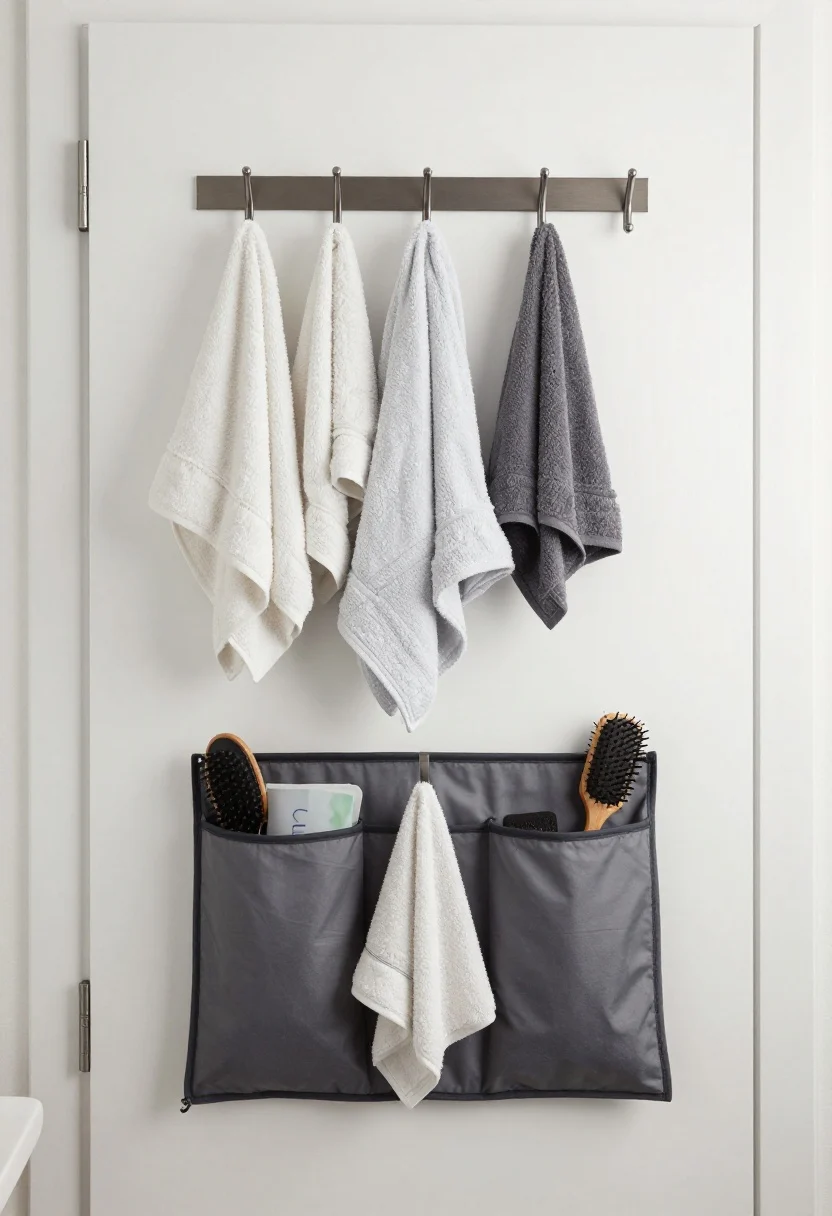
This image is by AI for inspiration only.
You toss damp towels on the only hook and then juggle robes, hair tools, and a spare tote that keeps sliding to the floor.
Why this works: Doors are prime real estate. An over-the-door rack or slim rail respects traffic flow and keeps bulky items up high, while distributing weight across multiple hooks reduces sagging and visual clutter. Spacing hooks 6–8 inches apart ensures items don’t collapse into a bulky heap.
- Choose an over-the-door rack with felt or rubber padding to protect paint and reduce clanking; confirm door clearance.
- Assign hooks by item: top row for robes and long towels, lower pegs for kids’ towels or hair tools in a breathable bag.
- Add a narrow fabric pocket organizer (washable) for flat items: hairbrush, heatless curlers, sheet masks.
- Keep paper goods elsewhere; moisture shortens their life. Use the rack strictly for washables and sealed items.
Budget note: A basic metal rack costs less than two plush towels. If you own your home, a wall-mounted rail with anchored screws will feel sturdier and quieter. With vertical surfaces optimized, it’s time to fix what guests actually see: open shelves.
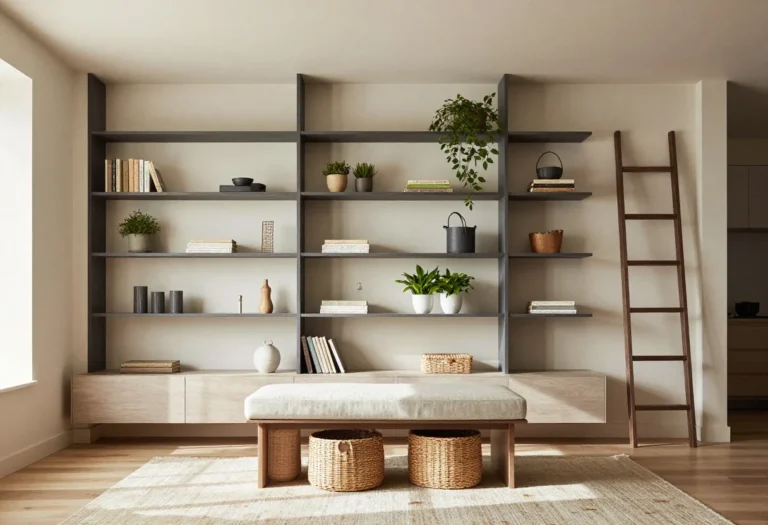
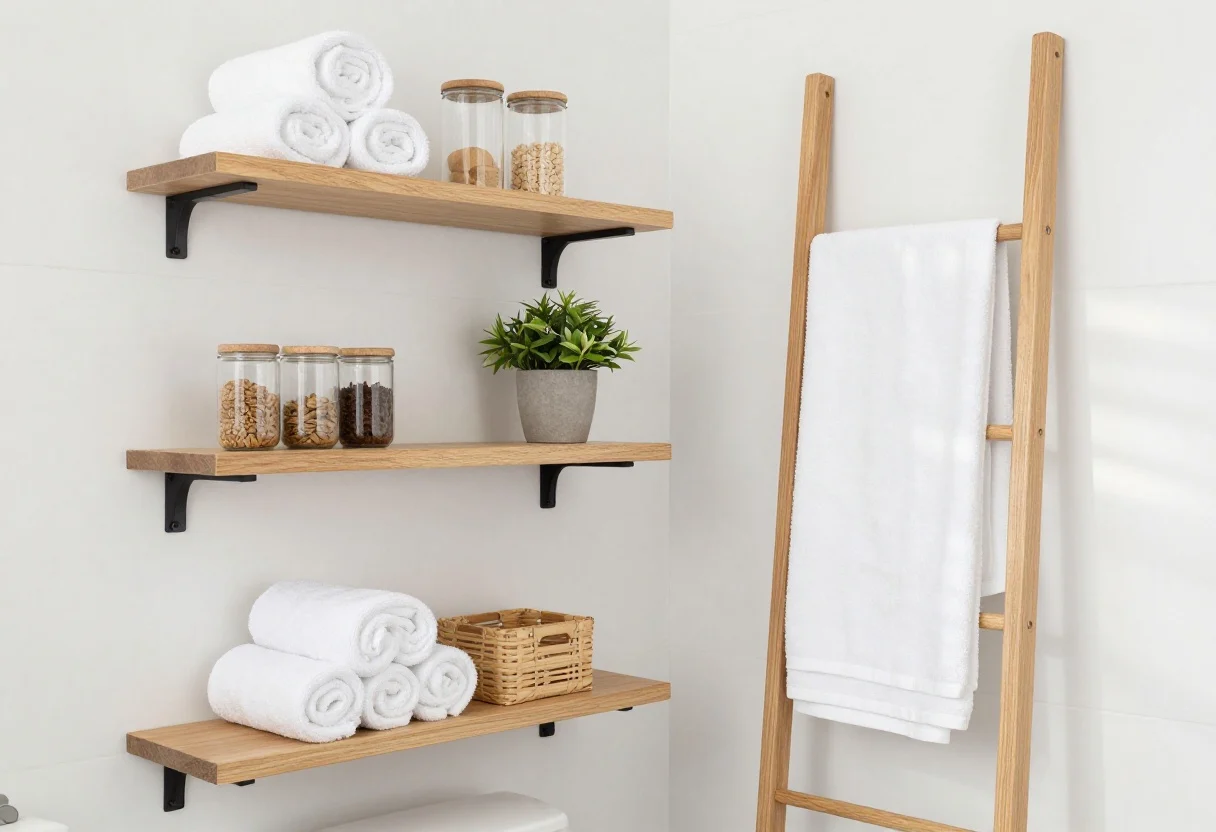
6. Float a Pair of Shelves and Hide the Chaos in Baskets
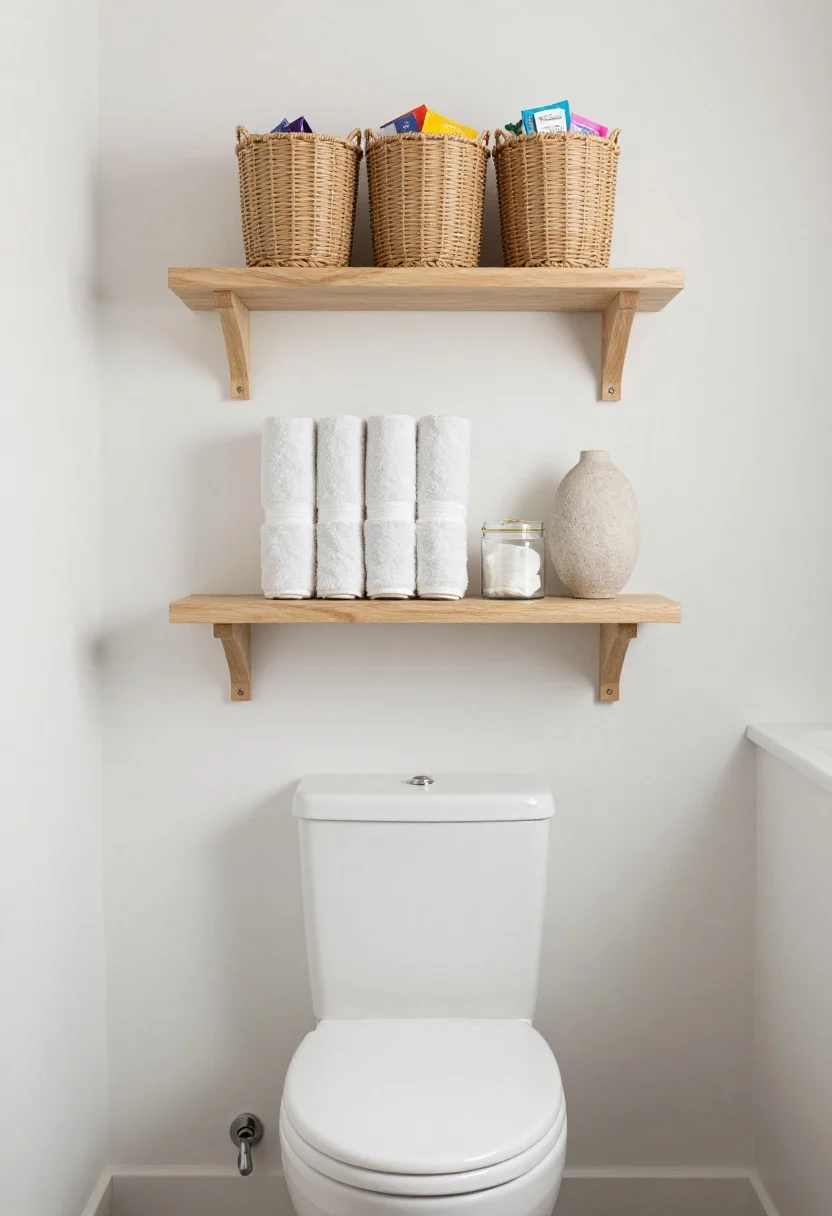
This image is by AI for inspiration only.
Your guest bath looks messy even when it’s clean—visible product labels, colorful boxes, and a loofah that refuses to look presentable.
Why this works: Open shelves create a focal point; uniform baskets and canisters simplify the color palette and texture. Light wood or white shelves blend into pale walls and preserve the room’s airy feel. Scale matters: two shelves often look more considered than three in small spaces, and maintaining 12–16 inches between them leaves room for rolled towels without crowding light switches or mirrors.
- Mount two floating shelves centered over the toilet or above a towel bar. Use a level and wall anchors rated for damp areas.
- Choose 3–4 identical baskets sized to the shelf depth (usually 6–8 inches). Add one glass canister with a gasket for cotton pads.
- Roll hand towels tightly; stand them vertically in a basket to keep texture tidy.
- Limit decor to one sculptural item (a small stone vase) to avoid visual noise and dust traps.
Mistake to avoid: Treating open shelves like a drugstore aisle. Decant or conceal anything with loud labels. If you can’t decant, store it behind a door or in an opaque bin. After styling, some bathrooms still need a mobile solution—especially rentals without cabinets.
7. Add a Narrow Rolling Cart as a Mobile Pantry for Bathroom Basics
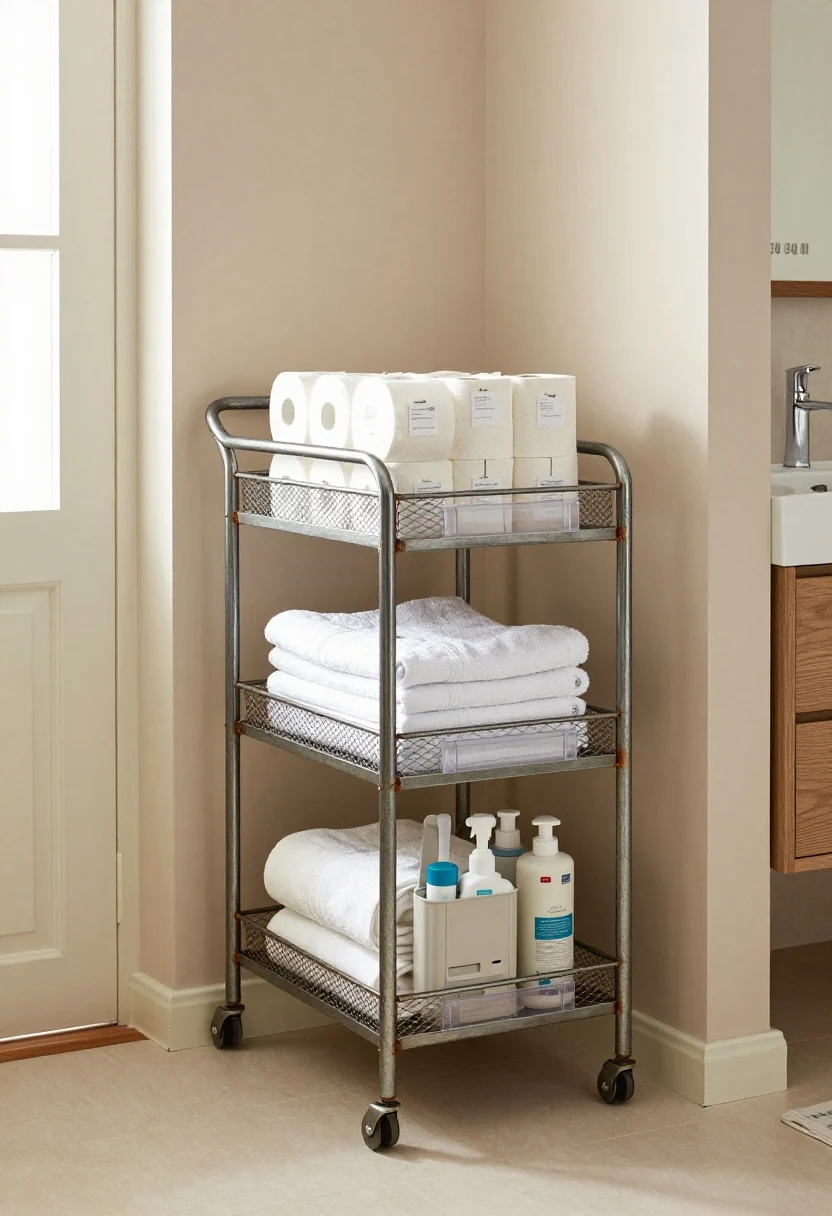
This image is by AI for inspiration only.
There’s no linen closet, and the vanity is tiny. Refills, extra towels, and cleaning supplies live wherever they fit—until you can’t find anything.
Why this works: A slim cart (8–12 inches wide) slips into dead zones: beside the vanity, between tub and toilet, or even in a hallway nook. Wheels preserve traffic flow and let you pull out what you need, then tuck it away. Metal mesh shelves improve airflow in humid spaces, and a top rail prevents items from toppling when moved.
- Measure the narrowest pinch point the cart must pass through, including door frames; leave at least 1 inch clearance on both sides.
- Choose a rust-resistant cart with locking casters; line shelves with removable plastic mats for easy cleaning.
- Create levels by category: top for daily refills (toilet paper, tissues), middle for towels, bottom for cleaning supplies in a caddy.
- Add clip-on labels or color-coded bins to reduce family guesswork.
Mistake to avoid: Oversized carts that block outlets or vent grilles. Keep height under 30–34 inches so it sits below mirror sightlines. If your cart lives outside the bathroom, match its color to your hallway palette—visual cohesion helps it disappear.
Renter-Friendly Tweaks That Still Look Built-In
If you can’t drill, lean on these materials and tricks:
- Peel-and-stick hooks rated for damp areas; place on painted walls, not raw tile grout.
- Freestanding over-the-toilet units and ladder shelves with rubber feet to protect tile.
- Magnetic strips inside metal cabinets or on a door with a removable magnetic board.
- Removable wallpaper behind shelves to create a “finished” niche look without holes.
Material Choices That Won’t Fight Humidity
Bathrooms challenge durability. Stainless steel and powder-coated metal resist rust. Solid surface trays, stone, or sealed bamboo handle splash zones. For textiles, look for Turkish cotton or waffle weave—faster drying reduces mildew. For paint on built-ins or shelves, choose a satin or semi-gloss finish for wipeability; matte shows water marks.
Color, Lighting, and Hardware Notes
Storage impacts how your bathroom feels, not just how it functions. Keep color quiet around busy areas—white, sand, pale gray—then add a single accent tone (eucalyptus green or navy) in one or two textiles. Warm LED bulbs (2700–3000K) soften surfaces, while high-CRI bulbs help you see true skincare tones. If you’re updating cabinet hardware, smaller baths benefit from slim, long pulls in a consistent finish; brushed nickel or matte black hides fingerprints better than polished chrome.
What to Buy, What to Skip
- Buy: Uniform organizers in a system you can expand. Keep extras for future-proofing.
- Buy: A single high-quality towel hook or rail per person using the bath. Label discreetly inside the hook base if needed.
- Skip: Overly decorative jars that trap moisture or have hard-to-clean lids.
- Skip: Deep baskets without liners—small items will vanish at the bottom.
Cost-Saving Alternatives
- Use clear shoe boxes as stackable bins under the sink; they’re cheap, uniform, and wipeable.
- Repurpose spice racks as narrow wall shelves for skincare—ideal for renters with small screws or adhesive options.
- Turn a magazine file on its side to corral hair tools; the metal mesh kind dissipates heat faster.
Maintenance That Actually Sticks
- Set a “Sunday reset” timer for 12 minutes: refill cotton, toss empties, wipe trays, and reroll towels.
- Adopt a one-in, one-out rule on products. If a new shampoo enters, the old one either goes to a guest basket or gets used up first.
- Label in the least visible place possible so aesthetics don’t tempt you to ignore the system.
Why Your Last Storage Attempt Failed (And How This Fixes It)
Past attempts often fail because they ignore traffic flow and scale. You bought big bins for a tiny vanity; you stacked products instead of giving them dedicated parking spots. The ideas above use shallow, reachable storage, separate daily from occasional items, and create hard boundaries (trays, dividers, baskets). That’s what makes them stick through busy mornings and shared households.
Small Space Example: 35-Square-Foot Bath
For a truly tiny bath with a pedestal sink:
- Install a 16-inch-wide over-the-toilet unit with two shelves.
- Use a back-of-door rack with four hooks and a slim pocket organizer.
- Add a 9-inch-wide rolling cart beside the sink for paper goods and towels.
- Stick a magnetic strip inside a metal medicine cabinet for tweezers and nail clippers.
This setup costs under a mid-range shower curtain but solves four categories of clutter.
Family Bath Example: Two Adults, Two Kids
- Shower corner pole with one basket per person—color-code silicone bottle bands.
- Drawer dividers: front row for adult daily items, second row for kid-safe items.
- Over-the-door rail with name-labeled hooks to end towel mix-ups.
- Floating shelves: top for backups, lower for guest towels and tissue.
Spending here is mid-tier, but waste decreases: you stop overbuying duplicates because you can see what you have.
Cleaning Tie-Ins That Boost Longevity
- Choose smooth-bottom baskets or add liners so dust and lint don’t stick to woven fibers.
- Keep a small cleaning caddy on the bottom of your rolling cart; if it’s easy to grab, you’ll spot-clean more often.
- Wipe bottles before decanting; residue creates sticky rings that undermine your “clean” look.
Style Without Clutter
Two styling accents are plenty: one plant (real pothos thrives in humidity) and one framed print in a moisture-safe frame. Everything else should earn its place with function. Your storage is the decor when the palette and textures are consistent.
FAQ
This image is by AI for inspiration only.
How do I keep open shelves from looking messy over time?
Use opaque baskets for anything with loud packaging, limit the number of visible product types, and assign each basket a single category. Keep one open spot per shelf so there’s always a landing space for a stray item during the week.
What’s the best renter-friendly storage that won’t damage tile?
Freestanding over-the-toilet shelves, tension corner poles for the shower, and over-the-door racks. For walls, use peel-and-stick hooks rated for bathrooms and place them on painted drywall, not on grout lines or bare tile.
Is decanting products worth the effort?
For daily liquids—yes. It reduces label noise, makes cleaning faster, and lets you see remaining quantity. Choose wide-mouth bottles with removable pumps so you can deep-clean monthly. Skip decanting medicated products with dosage instructions; keep those in a labeled bin.
Conclusion: Start with one easy bathroom storage hack that immediately clears space—the over-the-toilet shelves or a slim corner shower caddy. Once you feel the relief of a clean counter and no more bottle avalanches, add drawer dividers and a back-of-door rack. Layering two or three of these ideas will make your bathroom feel simpler, calmer, and genuinely clutter-free—exactly the goal behind an easy bathroom storage hack for a clutter-free space.
Image Credits:All images are used for informational or inspiration purposes only. Some images used in this post are sourced from royalty-free websites like Pixabay or created using Canva Pro. If you are the copyright owner of any image used here and would like it removed or credited, please contact me.